Server Depth and Rails: Rack Compatibility
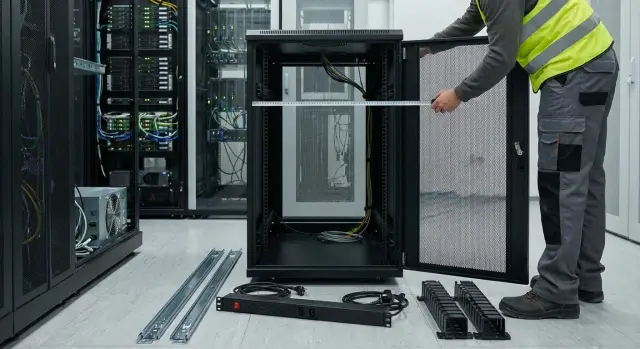
Server depth and rails: how to measure a 19-inch rack and avoid hitting the rear door, PDU and cables. A checklist and common mistakes.
Where incompatibility usually happens
Most often a server won't fit into a rack not because of height (U) but because of depth and mounting details. On paper everything looks correct, but in reality the rear zone is occupied and the rails don't allow the server to slide the required distance. That's why server depth and rail parameters are always checked together, not separately.
The problem typically appears during installation: the server goes onto the rails but hits something at the back, sits cocked, or doesn't latch fully. Sometimes it seems to fit, but the door won't close by a couple of centimeters. Worse, the door gets forced shut and after a week network or power errors appear due to pinched cables.
Even if the spec says the depth is sufficient, the usual culprits are:
- the rear door and its internal geometry (ribs, lock, handle) that consume clearance;
- vertical PDUs, especially when close to the rear rails or with protruding plugs;
- cable organizers that need space and a bend radius;
- different 19-inch racks with varying usable depth and mounting profile positions;
- the length of the rails and whether they allow the server to shift forward or backward.
In practice this ends in rail stress, a door that won't close, bent power and patch cords, and awkward access to ports. If the rack locks, there's an extra risk: after installation you may find the door cannot be properly locked.
To avoid ordering "blindly", take simple on-site measurements that are often skipped:
- usable depth between front and rear mounting profiles;
- clearance to the rear door in the closed position;
- how much space PDUs, plugs and cable bends occupy;
- space for cable organizers and minimum bend radius.
If you're selecting servers and racks for an office, data center or government project, it's better to take these measurements once on site than later change rails, move a PDU or order a different door.
Terms to speak the same language
When a server "fits on paper" by depth but won't install, various dimensions are often confused. Below is a short glossary that helps align rack, rail and rear-zone requirements.
Key dimensions
Equipment depth - the length of the server itself. It's usually measured from the front panel to the most protruding point at the back: power supply handles, cable retainers, covers and other bits. Clarify what the manufacturer defines as depth because protrusions can add 10–30 mm easily.
Usable rack depth - not the cabinet's exterior depth, but the space available for mounting and service. Practically, it's the distance between the planes of the front and rear vertical rails. This is where the rails must fit, not only the server chassis.
Front and rear vertical rails - perforated posts with U-markings to which ears or rails attach. In many cabinets rear rails are adjustable in depth. Moving a rail back gains cable space but you can then hit the door or a PDU.
Rail mounting depth - a parameter often more important than equipment depth. Rails usually specify a range, for example "fits rail distances from X to Y." If a rack falls outside that range, the server either won't secure or will sit without the needed engagement and locking.
Keep four numbers at hand when coordinating with a supplier or engineer:
- actual distance between front and rear rails;
- the rail mounting depth range from specs;
- actual equipment depth including protrusions;
- the rear "danger zone": PDU, organizers, hinges and door lock.
Clearances you must not eat away
Even if the hardware numbers match, you need margin. Clearance for ventilation prevents the exhaust area from being pressed against cables. Clearance for cables ensures proper bend radius so connectors don't work "on the bend." Clearance for service lets you slide the server on the rails and access modules without dismantling half the rack.
A practical tip: discuss not whether the server will "fit" but whether there will still be space after rails, cables and PDUs are installed so the door closes and the server can be slid out for service.
What actually hits the rear of the rack
On paper rack depth and server depth are simple math. In practice space gets eaten by parts remembered only at installation. So depth and rails must be checked together with everything behind the rear rails.
Rear door: it doesn't just close, it interferes
Many racks have perforated rear doors with stiffening ribs and protruding parts. Common obstructions are the lock, handle, opening limiters and inner frame. Often the first thing to hit is not the chassis but a part of the door. The door may not close or closes under strain and later damages cables.
Simple rule: measure clearance not to the door plane but to the most protruding part on the inner side.
PDU, organizers and cables: where depth disappears
Vertical PDUs cause the most surprises. They usually stand at the rear sides but sometimes are offset inward or have bulky plugs and switches. Even if the server body fits, power plugs can hit the PDU or the door.
Cable organizers also take space. Vertical rings and combs add thickness at the sides, horizontal bars can block cable paths right behind the server. This is particularly noticeable when power or network connectors are deep and cables exit near the door.
Bend radius is a separate issue. Copper patch cords tolerate bends more than fiber, DACs and thick power leads, where a sharp bend leads to problems quickly. Even if the door closes, it may press a cable bundle and force connectors to bend too sharply.
To catch conflicts early, check five things:
- what protrudes most on the inner side of the rear door (lock, rib, stopper);
- where the vertical PDU actually runs and how far plugs stick out;
- whether a horizontal organizer sits directly behind the server;
- how much room cables need for a gentle bend;
- whether the chassis has protruding handles, ears, connectors or latches.
Simple example: the server mounted on rails fits perfectly but two straight power cords hit the vertical PDU and the door, when closed, presses an optical patch cord. Changing to angled plugs and moving the cable to another organizer often fixes this, but it's better to see it before purchase and install.
Step-by-step: how to measure a rack before choosing a server
The goal is to determine real usable depth, not the nominal one. On paper a rack may be 1000 mm deep, but after the door, PDU and cables the internal numbers are different.
1) Prepare tools and record baseline data
Take a tape measure, notebook and a phone for photos. A caliper helps for precise measurement of door protrusions or fastener thickness, but usually a tape measure is enough.
Take 3–4 photos: the rack front, interior side, the rear with the door, and the PDU/organizer area. These help when you compare sizes with rail and chassis diagrams.
2) Measure the distance between front and rear rails
This is the key dimension for rails and chassis.
Measure from the plane of the front mounting rail to the plane of the rear mounting rail. If rails are adjustable, note the minimum and maximum positions. Measure the mounting planes, not the external panels.
Practical tip: measure top and bottom. Rails are sometimes not parallel and rails can jam during installation.
3) Check depth to the rear door including lock and ribs
Open the rear door and measure from the rear rail to the closest point of the door when closed. Many doors have internal ribs, a handle, lock or limiters that protrude inward.
Record the minimum clearance — that's what determines whether the door will close after the server and cables are installed.
4) Separately measure how much space PDUs and organizers occupy
PDUs, cable channels and holders often live in the rear zone and reduce usable depth.
Check:
- how far the PDU protrudes inward relative to the rear rail;
- whether organizers block the area behind the server;
- whether plugs and cable bends will intrude into the door-closing corridor.
Even a thin PDU can become problematic because connected plugs and cable bends stick out significantly.
5) Allow service and cable slack from the start
After the hard dimensions, add margin. This space is needed so cables aren't pressed by the door and so the server can be pulled out on rails for service.
Write separate lines: "usable depth to obstacle", "minus PDU/organizers", "plus cable allowance." With these numbers you can quickly check compatibility against server and rail documentation without surprises.
Rear door: how to account for its geometry and clearance
The rear door often breaks calculations. On paper server and rails fit, but after power and network are connected the door won't close, hits connectors or presses cables. This is not minor: pinched cables bend, fall out of ports, and ventilation can worsen due to incomplete closure.
How to know if the door will close after cabling
Check not only the server depth but the depth "with tail." Problem areas are power connectors, management connectors, SFP modules, patch-cord latches and the cable entry brush in the door.
Practical pre-purchase check:
- measure usable depth (between front and rear rail planes) and separately the distance from the rear rails to the inner surface of the door;
- add cable allowance to the server depth (often 70–120 mm, more for thick power cables or many ports);
- account for the brush strip and door reinforcement frame which also consume clearance;
- verify cables won't hit the door and can rest with a normal bend radius.
When in doubt, take the worst-case scenario: the server is pulled out for service and pushed back, the cable bundle becomes thicker and stiffer. If the door only closes under strain, that's a risk.
If the door can be removed or doesn't open fully
Sometimes people think: "We'll just remove the door." There are caveats. Doors aren't always removed quickly or without tools, which delays real operations. A door may open only partially due to an adjacent wall, rack or cable trays.
Check two things: can the door open enough to slide the server out on the rails, and do hinges or limits block access to the PDU and cables. If the opening angle is under 90 degrees, rear servicing usually becomes a problem.
Protruding parts people forget
Even with enough depth the door can collide with small protrusions. Common culprits: internal handles, locks, bulky hinge hardware, and brush strips that press cables on closure.
Quick method: place a ruler along the inner plane of the door and see what protrudes inward. Those millimeters matter because the server tail and cables often sit exactly in that area.
When to plan a rack without a rear door and the risks
A rack without a rear door is sometimes chosen where quick access is prioritized and physical protection is not required. It helps when many cables need a large bend radius.
Risks are clear: cables are easier to snag, dust and accidental touches increase, access control is harder, and noise is higher. In a shared space (office, classroom, corridor) removing the rear door usually creates security and operational problems.
Good rule: if you aren't sure about clearance, plan it into the layout (server, PDU, organizers) rather than fixing the situation later by removing the door and tolerating bent cables.
PDU and cables: where depth disappears
A rack may "fit" on paper, but the server still won't mount on rails or the door won't close. Often the issue isn't the chassis but that PDUs, plugs, organizers and cable-bend allowance eat the depth. This becomes obvious when hardware is selected and installation stalls over a few centimeters.
Vertical vs horizontal PDU: different risks
Vertical PDUs (0U) are typically mounted at the rear sides. This placement is often safer: there's less chance that a PSU or power connector will hit the PDU body. But if the PDU sits too near the center, it consumes the very area where power tails exit.
Horizontal PDUs (1U/2U) directly take up depth. They can block the cable bundle route from the server to vertical channels, and access to sockets can be awkward with taut cords.
Before install check:
- where plugs will sit relative to the server PSUs;
- whether the PDU body intrudes into usable depth;
- if there's space for a cable ring behind the server;
- whether power and low-voltage cables have separate paths;
- whether there is margin to add more cables later.
Bend radius and a closed rear door
A common mistake is to measure depth by hardware and forget bend radius. If the door closes almost tight, cables bend sharply at the connectors. That risks breakage, poor contacts and ventilation issues from a tangled bundle.
Rule of thumb: leave space behind the server not only for connectors but for a soft bend so nothing is pinched when the door is closed. Also plan empty space for future additions: today two ports, tomorrow an extra HBA, storage network or second PSU.
Rails: parameters that matter more than brand
When talking compatibility people often only think about U and weight. In practice depth and rails matter more than brand or even rack model: rails determine where the server will sit inside the cabinet and whether it can be serviced.
Rails can be fixed (little extraction) or telescopic (full extraction). For service telescopic rails are usually chosen because they make replacing disks, memory and PSUs easier.
The key spec is the rail mounting depth range. It's not the server depth but the distance between front and rear rails at which the rails attach without strain. If the rack is slightly deeper or shallower than allowed, mounting holes may not line up and extraction may jam.
A second common blocker is the hole and fastening type. Some rails are for square holes with cage nuts, others for threaded rails. Even within the 19-inch standard these are different: a kit might be for cage nuts while your rack has M6 threads, or vice versa.
Before buying check:
- the rail mounting depth range (min/max) and leave at least 10–20 mm margin;
- the fastening type: square holes with cage nuts or threaded rails;
- whether full extension is needed and if there's a latch in the pulled-out position;
- compatibility with cable management (CMA) or the ability to create a service loop;
- rated load for that specific rail pair.
Another practical point: extraction without hitting cables. If there are dense patch cords, thick power cables or an organizer too close, the server may only slide a few centimeters before stopping. Minimum requirement: allow full extraction with a neat cable loop and acceptable bend radius.
Typical mistakes when matching a server to a rack
The most common reason a server doesn't fit is simple: only the chassis depth was compared and the rear "tail" of connectors, cables and their bend allowance was forgotten. On paper everything matches, but the door won't close.
Mistake two: measuring the cabinet by outer body and assuming that's usable space. For mounting the distance between front and rear rails matters. Sometimes a deep cabinet has rails set forward, and rails with the server mounted hit a PDU or organizer.
Rails are also misunderstood: you may see a big maximum depth and assume it's fine, but if the rails can't compress to the needed minimum they won't mount.
Common causes of rework:
- calculating server depth without protrusions and cable slack;
- no space behind the rear rail for PDU, organizers and a service loop;
- measuring the rack by its body rather than mounting depth;
- pushing rails too close to fit and losing cable and door clearance;
- checking compatibility only after purchasing.
Small example: for a 19-inch rack a 2U server and rails were ordered according to specs. At installation the vertical PDU was right behind the rear rail and the thick power plugs hit the door. The server could be fastened, but the door wouldn't close and cables were bent.
Quick measurement checklist before purchase
Spend 10 minutes measuring before ordering servers and rails. Incompatibility usually arises not from a wrong model but from a few centimeters eaten by the door, PDU or cables.
5 measurements that solve 90% of problems
Record values in millimeters and note protrusions or limits:
- distance between front and rear rails (min and max if adjustable);
- depth to the rear door: from the rear rail plane to the nearest door detail when closed;
- how much space PDUs and mounts occupy, including plugs and cord bends;
- cable allowance: bend radius and service loops, especially for fiber and thick power;
- fastening type and rail compatibility: cage nut square holes or threaded rails.
After measuring do a quick mental check: imagine the server at its extreme rail position. The door should close without force, the server should slide out for service, and cables should not be taut or hit organizers or PDUs.
Practical tip: cut a cardboard strip the planned chassis depth and "try it on" at the server level. You will immediately see what hits the lock, a vertical organizer or PDU plugs.
If racks differ across sites, run this checklist for each.
Example scenario and next steps
Imagine a small office server room: a 42U rack is installed and you need to place 1–2 servers and a switch. The rack can't be changed, space is tight and access behind is via a single door.
The main risk is simple: a server fits on paper but in reality the door won't close or there's no room for power plugs, organizers and the bend radius. So before ordering, check not only dimensions but the rear zone: PDU, cables, door protrusions and how the rails behave when extended.
Mini plan before ordering
Start by measuring the rack and the rear zone:
- record mounting depth between front and rear rails and separately the clearance to the rear door;
- mark where PDUs will be and how much room plugs and bends need;
- check for brush strips, rear organizers and horizontal elements that eat depth;
- add service and cable allowance (practically often 50–80 mm or more).
Then match these numbers against server and rail documentation: mounting depth range, fastening type and extraction behavior.
If the rack is already in place and no rework is possible
Use simple measures that save installation: choose a suitable PDU format (often a side vertical gives more room), plan the service loop location, and ensure the server can extract on rails without hitting wiring.
If you need a second opinion, it's useful to check the whole kit (server, rails, PDU, basic cables) before purchasing. In integration projects this is often done with the manufacturer and integrator: for example, on gse.kz you can coordinate the rack, mounting depth and a set of rails for servers (including the S200 line) so you don't hit the door, PDU or cable area at installation.
FAQ
Why does a server that "fits on paper" not install or not allow the door to close?
Most often the issue is not U height but the rear zone: the geometry of the rear door, vertical PDUs, cable organizers and the space needed for cable bends. On paper the depth may match, but in reality power plugs, the door lock or connector "tail" get in the way.
Which two measurements are most important before buying a server and rails?
First measure the distance between the front and rear mounting rails, then separately measure the minimum clearance from the rear rail to the nearest protruding part of the door in the closed position. These two numbers usually determine whether rails will fit and whether there will be room for cables.
What is the difference between overall cabinet depth and usable depth?
Cabinet body depth tells you little. Useful depth is the real space available between the front and rear rails after accounting for the door, ribs, lock, PDUs and fastenings. For installation you need the usable depth between rails rather than the exterior cabinet depth.
What to check in rail specifications besides weight and U?
Look for rail mounting depth — the range of distances between front and rear rails at which the rails mount and operate correctly. If the rack is outside that range by a few centimeters, the rails may not secure, the server can sit cocked, or the slide may jam.
How to account for the rear door so you don't hit the lock or ribs?
Measure to the actual protruding part on the inside of the door: the lock, handle, stopper, stiffening ribs or inner frame. If unsure, add margin for connectors and cable bend because pressed cables later cause errors and instability.
How does a PDU typically 'eat' depth and interfere with the server?
Usually when a PDU is placed close to the rear rails or shifted inward, power plugs and cords end up in the area where the server's tail should be. Even a slim PDU becomes a problem because of plugged-in plugs and rigid cable bends.
How much space should be left behind a server to avoid cable bending?
Leave space not only for connectors but for a gentle bend radius, especially for fiber, DAC and thick power cables. Practical approach: plan the 'depth with tail' — server depth plus allowance for cables and a service loop so the door closes freely.
What small fastening detail often breaks a rail installation?
Check the type of holes on the rails and what fastening the rails are designed for: square holes for cage nuts or threaded rails. Mismatch is not visible in advertised depth, but at installation it becomes a simple 'no place to fasten' problem.
Why does a server sit correctly but not slide out for service?
If rails allow extraction but cables have no slack or a defined path, they will pull tight and hit the door, PDU or organizer when the server is pulled out. The solution is planning cable routing, a service loop and choosing suitable cable organizers rather than forcing the door closed.
What to do if the rack is already bought but servers are still to be selected?
Measure on site where the rails are, the PDU and organizers are located, and compare them with the rail mounting depth range and the server depth including protrusions. If you need help matching a full kit, GSE.kz as a manufacturer and integrator can help coordinate server, rails and rack layout to avoid surprises at installation.