Secure Boot and TPM on Servers: A Checklist to Avoid Breaking the Hypervisor
Secure Boot and TPM on servers: a practical sequence to enable protections, check keys and roll back settings so the hypervisor boots without surprises.
Why enable Secure Boot and TPM on servers
Secure Boot and TPM on servers are not just a "nice-to-have" checkbox — they protect against one of the most dangerous classes of attacks: replacing the bootloader, drivers, and early OS components before the hypervisor starts. If an attacker gains a foothold at that level, antivirus and normal policies are often powerless.
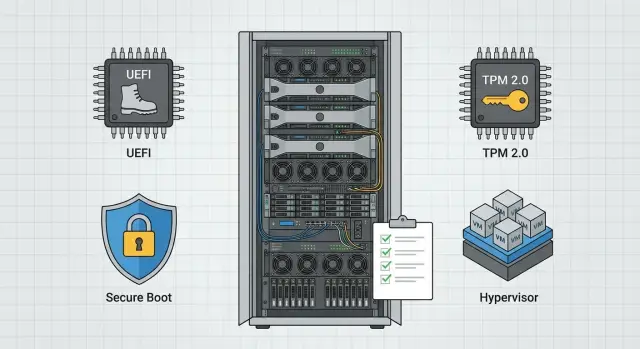
Secure Boot verifies signatures of UEFI and boot components and blocks anything that isn't trusted. TPM 2.0 stores keys and records boot measurements (Measured Boot): the system records what was loaded, and those records can be used to verify integrity.
It's important to understand the limits of these protections. Secure Boot and TPM won't save you from weak passwords, vulnerabilities in the hypervisor itself, incorrect permissions in virtual machines, or theft of backups. They provide a "honest boot" for the node and a chain of trust.
Hypervisors most often fail to boot after enabling protections for a simple reason: some components aren't signed with the expected keys, Legacy/CSM is enabled, an old bootloader is used, or there's a driver or module in the chain that used to load silently. In clusters this is especially painful: one node goes into maintenance mode and dependencies can cascade.
Signs that the problem is Secure Boot (not disk or RAID) typically include:
- after enabling Secure Boot you get a signature or "Verification failed" message
- the node drops into UEFI Setup or Boot Manager without booting
- the disk is visible in UEFI but the boot record doesn't start
- the same image boots when Secure Boot is disabled
This is especially important for virtualization, remote sites, and industries with higher requirements: government, finance, healthcare, education. In these environments the server must be predictable on reboot and auditable by policy. In practice it's easier when hardware is supplied and serviced locally and the UEFI profile is configured uniformly (for example, in projects using GSE servers).
How the chain of trust works
The server should only run what you allow and be able to prove it booted "correctly." Secure Boot prevents unsigned code from running, and TPM helps record what was actually loaded.
UEFI holds a set of trusted keys and certificates. When Secure Boot is enabled, UEFI checks the signature of each critical boot component at startup: first the bootloader, then the next stage (for example, the boot manager or kernel). If the signature is unknown or the file was modified, boot stops. The practical point is simple: prevent unnoticed replacement of early boot components.
TPM 2.0 can be thought of as a "safe and a log":
- the "safe" stores secrets so they can't simply be pulled from disk (for example, encryption keys)
- the "log" records boot measurements: hashes of what was executed, stored in PCR registers
Secure Boot blocks execution of components that fail signature checks. Measured Boot usually doesn't block; it measures and records facts about the boot in the TPM. Together you get two controls: "don't run the wrong thing" and "be able to verify what ran" (locally or via attestation to infrastructure).
For hypervisors the whole chain matters, not just one file. Typical checks or measurements include the bootloader, hypervisor image or kernel, early drivers and modules, and sometimes initramfs.
Preparation before changes: what to check and record
Treat enabling Secure Boot and TPM as a change to the boot scheme. Most problems come not from the protections themselves but from an old Legacy installation or a non-standard bootloader.
First, identify the exact server model and UEFI/BIOS versions (and BMC, if present). For rack servers it's useful to check whether the vendor recommends firmware updates before enabling Secure Boot. Updating firmware at the last minute is risky, but you should know the current versions.
A critical point is the boot mode. Make sure the hypervisor was installed and boots in UEFI, not Legacy/CSM. If the system was installed long ago, the disk may be partitioned for BIOS boot, and enabling Secure Boot will drop you back into UEFI.
Before any changes, record the current state so you have something to compare and roll back to:
- boot mode (UEFI or Legacy/CSM) and current Secure Boot state
- boot order and the selected entry
- controller and boot volume mode (RAID/HBA and which array is boot)
- TPM state (enabled or disabled, TPM 2.0, whether a Clear will be required)
- parameters that affect startup (for example, PXE first)
Then prepare access in case the network doesn't come up: console access (local or via BMC/iKVM), a tested ISO or bootable recovery media, and a maintenance window with a clear rollback plan.
Where to find the necessary UEFI settings (and what they mean)
On most servers the relevant items are nearby but named differently. Secure Boot is usually under Security or Boot, and TPM under Security, Trusted Computing, or Advanced.
Secure Boot: switch and key mode
Besides Secure Boot state (Enabled/Disabled) there's often a mode like Standard or Custom.
Standard means factory keys: usually it's enough to enable Secure Boot and avoid touching key management. Custom opens manual control and is needed only if you truly build your own trust chain.
Keys are typically presented as:
- PK (Platform Key) – the platform's primary key, which determines who can change Secure Boot settings
- KEK (Key Exchange Key) – keys for updating trust databases
- DB (Allowed Signatures Database) – trusted signatures
- DBX (Revoked Signatures Database) – revoked signatures that are blocked
The practical risk is simple: if you clear PK/KEK/DB, firmware will stop trusting the hypervisor bootloader. DBX is important too: it protects against known vulnerable bootloaders, but after a DBX update an old image may suddenly stop booting.
TPM 2.0: enabling and state
TPM usually has two steps: enabled and activated. Look for settings like TPM Device/TPM Support, TPM Version (2.0) and status Enabled/Activated (sometimes also Clear).
Clear resets the TPM state and can affect encryption and secrets bound to TPM. Don't press it without a clear understanding of consequences and a recovery plan.
Settings that most often break boot
Secure Boot is tightly related to boot mode and ROM modules:
- CSM (Compatibility Support Module): Secure Boot usually requires a pure UEFI setup
- PXE/Network Boot: network boot must be UEFI-compatible or the node can hang trying to PXE
- Option ROM Policy: choose UEFI ROM where possible; Legacy ROM on some cards conflicts with Secure Boot
If you're preparing servers for a cluster, record where these items are located for the specific model and apply identical profiles. This saves time when enabling protections on all hosts without surprises.
Step-by-step: enable TPM and Secure Boot with minimal downtime
The safe sequence logic is: first enable what rarely breaks boot (TPM), and then enable what can block unsigned bootloaders (Secure Boot).
-
Verify the node is already in UEFI and CSM is off. If it's currently Legacy, plan the move to UEFI as a separate task.
-
Enable TPM 2.0 (or Intel PTT/AMD fTPM), save settings and reboot. Ensure the hypervisor starts as usual.
-
Make sure your hypervisor and its bootloader are compatible with Secure Boot. If you use custom drivers, old ISOs, or a non-standard bootloader, test on a lab node first.
-
Enable Secure Boot and start with Standard/Default (factory keys), without replacing keys manually.
After the first successful start, record exactly what was enabled, which parameters changed, and any messages in the hypervisor and BMC logs.
A useful final tuning: reduce possible boot options to what is actually needed. Extra items (PXE, USB, virtual drives) don't always break Secure Boot directly, but they often create confusion after updates and reboots.
Checks after enabling: what should be "green"
The node should not only boot, but boot reliably and without fallbacks.
Check three things:
- Secure Boot is enabled and the system truly boots in UEFI
- TPM is detected as TPM 2.0 and is in the expected state (Enabled/Activated; if "present but not ready" that's a sign to investigate, not to panic)
- in UEFI Boot Manager the correct EFI bootloader on the system disk is first, and the entry persists after several reboots
Then remove obvious workarounds, especially if different people service the server:
- USB boot is disabled or protected by an admin password
- PXE is disabled or configured so it cannot replace the bootloader
- UEFI settings are protected by a password
Repeat these checks after hypervisor or firmware updates. Problems sometimes appear not immediately, but on the next reboot.
Common mistakes that lead to a black screen
A black screen after enabling protections almost always means "boot rules changed," not "the server is broken."
The most common cause is mixing Legacy and UEFI. An older host might have been installed in Legacy mode or with an unsigned bootloader. After switching to UEFI and enabling Secure Boot the firmware blocks the unsigned component and you return to the Boot menu or see a blank screen.
A second typical cause is manual key work in Custom mode. If you removed factory PK/KEK/DB or replaced them without a recovery plan, the firmware may stop trusting even a correct hypervisor.
A third mistake is changing everything at once: enable Secure Boot, update BIOS/UEFI, and update the hypervisor simultaneously. If something goes wrong, it's unclear which step caused it.
Finally, don't forget early drivers: storage and network modules, iSCSI/NVMe-oF, RAID/HBA. If they are unsigned or incompatible with the Secure Boot policy, boot can fail very early.
TPM-related errors can be more severe than just "it didn't boot." If you Clear TPM on a node with encryption or secrets bound to the TPM, you may lose access to data.
If the hypervisor doesn't start: a safe rollback plan
Don't make abrupt resets or change ten settings at once. A calm check of basics usually helps.
-
Enter UEFI and confirm the boot mode matches the installation (UEFI vs Legacy/CSM) and that Boot Order points to the correct entry (UEFI: <disk> or a specific EFI Boot Manager).
-
Temporarily disable Secure Boot while leaving TPM enabled. This quickly separates signature problems from other causes.
-
If the node boots without Secure Boot, go back to UEFI and check key mode. If you changed keys, use an option like Enroll/Restore default keys instead of manual edits, then re-enable Secure Boot.
-
If it still won't boot without Secure Boot, return to basic diagnostics: correct disk, correct UEFI entry, controller or volume not disabled.
After each change make a single boot attempt and record the result.
Plan B is booting into a rescue/maintenance environment and repairing EFI records. Usually recreating the EFI boot entry and reinstalling the hypervisor bootloader (ESXi/Hyper-V/Linux KVM) helps. Don't format the EFI partition at random: first check whether there is a second working copy.
Checklist before handing the node to production
Before returning the server to the pool, go through a short verification:
- the node boots in UEFI, CSM is off
- TPM is enabled as TPM 2.0 and detected without warnings
- Secure Boot is enabled, keys are in Standard (or a documented custom set exists)
- remote console access is available and there is a clear way to revert UEFI settings
- the hypervisor successfully booted after reboot at least twice
Also record a "golden image": server model, BIOS/UEFI and BMC versions, boot mode, Secure Boot and TPM status, boot order and list of allowed boot devices. This helps a lot for audits and incident investigation.
Real-world example: enabling protection on a cluster without surprises
A three-node virtualization cluster with identical hardware. An admin updated firmware and enabled Secure Boot on one host, leaving the other two as-is.
After enabling Secure Boot the node rebooted and never came back: a black screen with only entry to UEFI. It looked like a system failure, but in fact the boot chain had diverged.
Troubleshooting took less than an hour because checks were done in order:
- confirmed the system was actually booting in UEFI, not Legacy/CSM
- checked Boot Order: after firmware update the wrong disk became first
- checked Secure Boot keys: the mode was enabled but no keys were installed (Secure Boot on, but nothing to trust)
- temporarily disabled Secure Boot, booted, recorded the state, then re-enabled Secure Boot correctly
On the other two nodes the changes were split into steps: firmware update and check, then TPM and check, then Secure Boot with keys. After each step there was a reboot and quick checks.
Next steps: standardize and scale the setup
Once protection works on one node, the main future risk is manual differences between servers: one set to Custom, another left at Standard, a third with keys changed. Then any update becomes a lottery.
Reduce configuration to a few clear rules and formalize them as internal standards: only UEFI without CSM, a unified Secure Boot policy (mode and who can change keys), separate change windows (firmware separately, Secure Boot separately), and enabling one node at a time in a cluster.
If you plan a turnkey rollout, discuss a single UEFI profile and verification steps with the integrator in advance. In projects with GSE.kz (gse.kz) hardware this approach usually helps get identical settings across a batch of servers and reduces time spent hunting each node's peculiarities in operation.