Restore a computer lab after a failure in 4–6 hours
Restore a computer lab after a failure in 4–6 hours: spare image, spare-parts kit, team roles, step-by-step plan and quick pre-lesson checks.
What a failure in a computer lab means and why every hour counts
A computer lab failure is not just "the browser didn't open." It is a situation where the classroom as a system stops working: most PCs won't boot, users can't log in, the network is unavailable, or the teacher can't start the lesson as planned.
Most often lessons are stopped by four groups of problems: the OS crashes after a failed update or configuration change; the network goes down (switch, DHCP, domain, Wi‑Fi); power issues appear (breakers, UPS, power strips); disks fail en masse or a single critical node breaks (for example, the drive with the image or profiles).
Time is critical because of the schedule. You have a window between lessons, usually 10–20 minutes, and at most 4–6 hours until the next big block of classes or the end of the school day. If the lab is idle, not only the current lesson suffers but several following groups too, and rescheduling quickly eats up the week.
Therefore you need a 4–6 hour emergency recovery plan, not just hope in backups. A backup answers "how to restore data" but not "how to quickly restore lessons." For lessons, it's more important to quickly bring a consistent working environment to most machines, even if some data are restored later.
Success in emergency recovery means lessons run on schedule again:
- students can log in without lengthy manual setup
- the network and access to required resources work
- basic applications (browser, office, educational software) start
- the teacher can manage the class and start on time
Example: at 10:50 the lab is down, and the next lesson starts at 11:00. If within 4–6 hours you revive at least 80–90% of the workstations and the network, teaching is saved. Remaining "cosmetic" issues can be fixed after lessons.
Recovery goals: the minimum needed for lessons
The main risk in the first hours is trying to restore "everything as it was." That almost always stretches the downtime. It's better to agree in advance on a minimum goal: lessons must proceed on schedule even if some conveniences are temporarily unavailable.
A practical goal for the first hours is to quickly bring most workstations online. For many schools and training centers this is 70–90% of computers that boot, allow users to log in and run required programs. The remaining seats can be closed as spares or students can be moved.
Minimum functions required for a lesson
Define a short list of what is essential for a lesson. Typically it is enough to have:
- user login (local or domain)
- access to a browser and the internet or to local materials
- launch of educational software (office, programming environment, simulator)
- ability to save work (network folder or cloud)
Include printing as "critical" only if it is truly required for the upcoming lesson. Otherwise you'll waste time on printers and drivers when the lesson could already proceed.
Where to record information to avoid chaos
Alongside recovery, you need a single clear collection point: a paper sheet on the administrator's desk or a shared file on a separate laptop.
Record the minimum that helps make decisions:
- list of computers with status (working, not booting, no network, cannot log in)
- time and actions taken on each machine (so you don't repeat steps)
- who is responsible for what (one person — one zone)
- key symptoms and messages (photos of screens help)
The rule for the first 4–6 hours is simple: stabilize the lab to a learnable state first, and only then investigate root causes. Deep analysis is better scheduled for a separate window when lessons are running and there is time to work carefully.
First 15 minutes: diagnose without unnecessary actions
The first minutes are the most important. The task is not to fix, but to quickly understand the scale. Answer three questions: how many PCs are down, is the network available, and is this limited to one room or wider.
Start with observation: how many machines do not boot at all (no power, black screen), how many hang during boot, and how many boot but won't allow login or can't reach the internet. At the same time, clarify if anything happened before the failure: updates, equipment moves, cable changes, account modifications.
Quick checks take 5–7 minutes and often immediately point to the cause:
- Power: power strips, PSU switches, LEDs on towers and monitors.
- Cables: network cable at the PC and at the wall, proper seating, visible kinks.
- Switch: is it powered, do ports blink, is the uplink off.
- DHCP and network: does a working PC get an IP, do network resources open, is the server visible.
- Accounts: is the problem on all machines or only some (common causes are lockouts, expired passwords, wrong domain).
After that classify the incident. Usually a simple gradation is enough: single PC, group of PCs (for example, a row), entire lab, or server-side (DHCP, domain, file server). If everything failed at once, don't waste time on manual fixes at each seat.
A rule of thumb: if within 10–12 minutes you don't find an obvious cause (cable, port, power), switch to the mass recovery plan. For example, if 12 of 15 PCs hang on the same screen, it's faster to prepare deployment from a spare image than to try to "fix" each machine in turn.
Role distribution: who is responsible for what during an incident
When the goal is to recover the lab in 4–6 hours, the main risk is not the hardware but the chaos: everyone does everything and no one is accountable. Roles should be assigned in advance so that on the incident day you just activate the scheme.
Minimum set of roles:
- Incident coordinator: sets priorities (what is needed for the next lesson), manages timing, records decisions and current status.
- Hardware technician: checks power and network, swaps suspect components, works with the spare parts kit and identifies obvious failures.
- Image and software technician: responsible for the spare system image, reimaging, domain policies, drivers and basic applications.
- Educational representative: decides by schedule what minimum is required by the teacher.
The coordinator does not need to "repair" personally. Their job is to keep order: first restore the required number of workstations and the teacher's PC, then address the rest. They also keep a short log: what was found, what was done, what is postponed.
Keep communications in one channel (for example, a common chat). Post short status updates on a schedule, every 30 minutes: how many PCs are ready, what is blocking work, the next step and how long it will take.
The decision to stop classes or move a group is made by the educational side but based on facts from the coordinator. A simple guideline: if in the first 60–90 minutes you cannot bring up the minimum number of seats and the network, it's better to agree on moving lessons earlier than dragging to the last minute.
Example: if the hardware tech sees the switch won't come up, the coordinator logs that as the main blocker. The image tech meanwhile can prepare an offline startup for some PCs, and the educational rep decides what lesson format is possible today.
Spare image: how to prepare and avoid discovering problems on the day of the failure
A spare image is a full snapshot of a computer that can be quickly deployed to bare hardware: OS, applications and settings. It differs from file backups because it doesn't require reinstalling the OS and software piece by piece. In a fast recovery scenario, an image almost always saves time.
A good image should be "educational," not "personal": not tied to a specific user and without random settings that only work on a single machine.
Typically an image includes:
- OS with required updates and basic configuration
- drivers for all typical models in the lab
- educational software (including licenses and offline activations, if used)
- policies and restrictions (accounts, rights, disabled panels and autoruns)
- access settings for printers, folders, domain
Storage is a common cause of failed fast recovery. Keep at least two copies on different media with clear version control: one nearby for speed and a second separately (in case the room or the same storage is affected).
Update the image after major OS updates, software changes and before high-load periods (for example, before exams). Otherwise you'll save time on deployment only to lose it on urgent patches and installations.
The most important thing is to verify integrity by test recovery. Once a month (or after changes) deploy the image to one machine and check user login, network, key program launches and, if needed, printing. Otherwise you'll discover a problem on the day of the failure when there's no time.
If your fleet is built from identical models (for example, the same PCs and monitors), maintaining the image is easier: fewer drivers and fewer surprises during deployment.
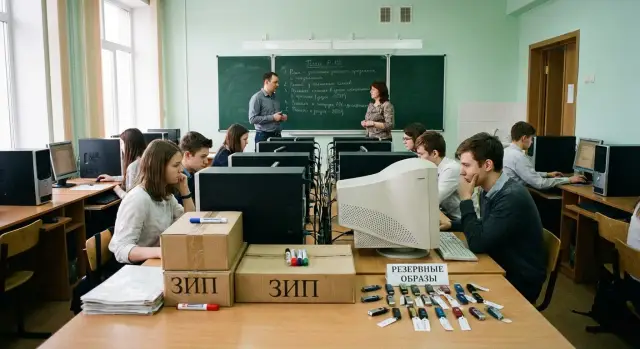
Spare parts kit: what should be at hand in the computer lab
For a 4–6 hour recovery a spare parts kit solves half of the problems. Without spare parts you'll spend time searching, purchasing and approving instead of repairing.
Keep the kit in one labeled box or small cabinet near the lab. The idea is simple: anything that can take one workstation down should be replaceable in 5–10 minutes.
Minimum items that usually help:
- 1–2 SSD/HDD of the appropriate form factor
- 2–4 sticks of compatible RAM
- 1 power supply for a typical tower model
- a set of cables (power, HDMI/DP, Ethernet)
- 2 mice and 2 keyboards (basic, no drivers)
Also useful are consumables and tools: thermal paste and wipes/isopropyl, screwdrivers (Phillips, TORX, small), a simple tester or USB power tester, spare power strips and surge protectors, cable ties and markers.
Keep an offline folder for credentials and media: bootable USB sticks, local copies of drivers, admin passwords, contacts of responsible persons. On the day of a failure the network or domain is often unavailable and online credentials suddenly stop working.
Labeling saves an hour. Mark which power supply and RAM match which PCs, where the "recovery USB" is, who issues the kit and how returns are recorded. If the lab uses one lineup of PCs, compatibility is simpler and the kit can be smaller.
For a lab of 10–20 workstations, usually one "critical" kit (drive + PSU) and 2–4 small spares (RAM, mice, cables) are enough. Base the quantities on last year’s failure statistics.
4–6 hour scenario: step-by-step recovery plan
Timing for a single incident
0:00–0:30. Stabilize the base and record the situation. Start with power and network: check breakers, UPS, cables, switch, DHCP. Then quickly gather facts: which PCs do not boot, where is a blue screen, where is no network, where is there no access to shared folders. Write down the list of affected machines and common symptoms.
0:30–1:30. Choose a reference and decide on recovery method. Find one PC that works correctly, or bring one to order manually. This becomes the reference for comparison. Then decide whether to roll back from a spare image or do targeted repairs. Prepare media (USBs, external SSD), admin credentials and a driver folder.
1:30–3:30. Recover in waves. Work in batches of 5–10 PCs to identify recurring causes in parallel. While some machines are being imaged, others receive quick hardware swaps from the spare kit: cable, PSU, SSD, memory. If the problem is network-related, don't touch the OS until the network node is fixed.
3:30–4:30. Bring machines to "lesson-ready" state. Deliver missing drivers and educational software, check domain or local account logins, access to printers, internet and shared resources. Also ensure policies and antivirus do not block required applications.
4:30–6:00. Final check and documentation. Run a short test on 2–3 PCs: student login, launch typical programs, save a file, print (if needed). After this record which PCs were restored and what is postponed for "after lessons."
Checkpoints to stay on schedule
Keep these readiness criteria in mind:
- 80–90% of workstations boot and log into required accounts
- the network is stable and one shared resource for assignments is available to all
- typical lesson programs open within 10–20 seconds
- 2–3 problematic PCs are removed from the room and replaced with spares
- incident log is completed: what broke, what worked, what to improve
This recovery plan works best when you already have the image, spare parts and decision rules prepared in advance.
Example scenario: fitting recovery into 5 hours before the next lesson
After an evening update some PCs go into a reboot loop. There are 5 hours until the next lesson and you cannot simply close the lab for the day. The goal is not perfect repair but enough working seats by lesson start.
Decisions are made quickly: one faulty PC is pulled for repair, the rest are reimaged from the prepared image but not all at once — in waves. This avoids overloading the network and gives you the first ready seats faster.
How it looks over time
Parallel work is key.
- 0:00–0:15: record symptoms, disable auto-updates, select a "patient" for repair.
- 0:15–1:30: first wave from the image (e.g., 8–10 PCs), check login and required programs.
- 1:30–3:00: second wave and replacement of small items (cables, mice) from the kit.
- 3:00–4:30: third wave and reach a stable count of seats, test network and printing if needed.
- 4:30–5:00: final test and seat assignment for students.
The teacher uses this time for theory: introduction, task explanation, or board work. The coordinator keeps a list of ready seats: PC number, status, remaining issues (e.g., "image restored, no sound").
Every 30 minutes do a quick recount: how many seats are ready, how many in process, what blocks progress. If the network slows, reduce batch size. If the problem is widespread, stop experiments and follow the plan.
Result by lesson start: for example, 18 of 20 seats are up, one PC in repair, another left for evening due to a rare error. After lessons, analyze the update cause and update the image to avoid repeat incidents.
Common mistakes that delay recovery
Most time is lost not by rare failures but by a chain of small decisions.
One typical problem is mixing different image and driver versions within one batch of PCs. As a result, some machines boot quickly while others suddenly lose network, sound or projection. This is especially visible if the lab has similar but not identical configurations (different motherboard revisions or Wi‑Fi modules).
The second mistake is trying to fix "everything at once" instead of focusing on the minimum needed for the next lesson. When time is limited, it's better to bring up student seats and the teacher's PC than to spend an hour on a printer that is not essential for the lesson.
Often accounts, licenses and access policies are remembered at the very end. Then the image is already deployed but login fails, required programs don't start or network folders are inaccessible. A final 20-minute check can become another hour.
Another slowdown is having a spare kit but without labels. Unlabeled power supplies, cables, RAM and drives force people to guess compatibility on the spot. Labeling and a simple table "which model this part fits" save tens of minutes.
Before declaring the lab ready, run a short checklist:
- the reference PC boots from the image and works without manual tweaks
- student and teacher logins are tested and succeed
- network, sound and required peripherals are checked on at least one machine
- key educational programs and files open
- the spare kit is labeled and sorted by compatibility
If after imaging several PCs you suddenly "lose sound" on multiple machines, it's usually different drivers or audio devices. It's faster to move those PCs to reserve and leave the analysis for the evening.
Quick checklist before letting the class in
Before admitting the group, do a brief 10–15 minute check. This catches small issues that usually surface with the first assignment and disrupt the lesson.
Start with two types of logins: a student account and an administrator account. Often the lab is restored under admin, and student accounts later can't see needed folders or can't run a program.
Check basic items on several PCs and then spot-check others:
- boot without errors, correct date/time
- network: shared resources visible, required folders open, internet works where the lesson needs it
- 2–3 key educational programs: launch, open a sample file, perform a simple action (save, export)
- peripherals: keyboard, mouse, sound, projector on the correct input, printing (if needed today)
- updates and background tasks: nothing heavy starts during the lesson
If time is very short, do a mini-test on the teacher's machine and two student PCs from different rows. This quickly reveals a cable, switch or outlet issue.
After the check record the result: which PCs are ready, which were restored from the image, what was replaced from the kit and what needs replenishing. If you have equipment and support from GSE.kz, it's useful to also record serial numbers of replaced parts — this helps track service history.
Next steps: make the next failure easier
After lessons resume, don't close the topic. The most valuable hour is the one you spend right after the incident while details are fresh.
First document the outcome: what failed, which solutions worked and where you lost most time. Often the problem is not "complex technology" but small things: the wrong driver in the image, a missing cable, an admin password known by only one person.
A working base for the next time usually includes:
- update the spare image (fixes, drivers, versions of educational software, date and list of supported models)
- replenish and label the spare kit (replace what was used)
- a short 15–20 minute debrief with conclusions and actions (no blame)
- reduce the variety of models where possible: fewer configurations mean fewer surprises
- maintenance rules: who updates the image, who tracks the spare kit, who decides "reimage now"
Then introduce regular tests. The simplest approach is a quarterly control reinstall on one reference PC and timing how long it takes until full readiness (including network, domain auth and resource access). If a test suddenly takes 2 hours instead of 40 minutes, you learn that in a calm day.
Finally, consider reliability foundations: identical, predictable machines and a unified service approach usually result in less downtime. If you need supply and support, consider a local manufacturer and integrator with a service network, for example GSE.kz (gse.kz): they offer PCs and all‑in‑ones for classrooms and 24/7 technical support, which helps close incidents faster and plan maintenance.