Hot spots in the rack: how to eliminate overheating in 1–2 days
Rack hot spots cause throttling and failures. We cover inspection, U‑by‑U measurements, equipment rearrangement and quick measures to stabilize temperatures in 1–2 days.
What is a hot spot in a rack and why it’s dangerous
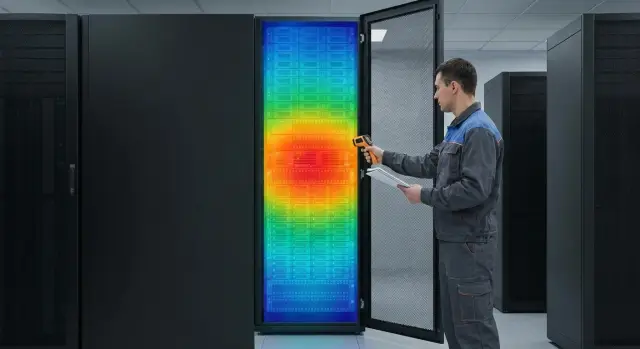
A hot spot in a rack is a small area inside a single rack (often a specific 1–3U or a band at face or floor level) where the intake air temperature into servers is noticeably higher than elsewhere. The overheating is local: nearby areas may be fine while devices at one level consistently report higher temps.
Usually the problem isn’t that “the data center cooling fails,” but that air inside the rack doesn’t flow as you expected. Cold air doesn’t reach where it’s needed, and hot exhaust returns to the server intakes. This is recirculation: a server expels hot air, and the same air is drawn back in as intake.
Hot spots cause more than sensor numbers. Overheating quickly leads to practical consequences: CPUs and GPUs throttle, performance drops, response times increase. Disks and controllers produce more errors, fans run at maximum (noise and wear), and you can get reboots or emergency power-offs. Even if “everything works,” continuous operation in heat accelerates component aging and raises failure risk.
Hot zones most often appear because of simple issues: open empty U without blanking panels, cable bundles blocking intake, wrong airflow direction (for example, side exhaust in a dense rack), gaps in doors and side panels, and other "short paths" for air.
Sometimes one change is enough: you replace a server with a higher-power model, add a second PSU, reroute patch cords, or perform cabling work. Externally the rack looks the same, but internally the aerodynamics change: a hot-air "pocket" forms or an intake gets blocked. That's why hot spots often appear suddenly: “yesterday it was fine, today it’s hot.”
Quick symptoms: how to tell overheating is local
Local overheating usually looks like an "island" of trouble rather than a room‑wide temperature rise. One or two U or a group of devices at the same level are affected, not all servers at once.
Start with what you already have in logs and monitoring. It’s more useful to compare dynamics: what changed over the last hours or days, not just “temperature is high.”
What logs and sensors suggest
Typical signals:
- Fan speeds increase sharply on individual servers without a significant rise in workload.
- Inlet temperature spikes on several devices within the same rack zone.
- The inlet/outlet difference becomes unusually large specifically for that device group.
- Warnings about throttling or thermal events appear in logs.
- Disk and controller errors grow on one node.
If CPU utilization is normal but inlet and fans rise, it’s often not a heavy application but poor intake airflow at a specific spot.
External signs and system behavior
A quick on-site check helps. Sometimes only the door or side panel is hot at a particular band, e.g., 18–26U. You may hear that not all servers are noisy—only 1–2—and the noise comes in waves.
From the application side, local overheating often shows as spikes: response times increase, background jobs slow down or briefly fail, while network and disks appear healthy overall. Example: reports take twice as long by the end of the workday, then normalize 20 minutes later after throttling reduces.
To distinguish a rack-local issue from a room cooling issue, compare neighboring racks and different heights. If the room is warm, temps usually rise across most racks and especially at the top. If only one rack or one U range is “on fire” while nearby racks remain stable, the cause is likely inside that rack.
One-hour prep: what to do before measuring and moving
To fix the issue in 1–2 days, careful preparation matters more than heroics. In one hour you can collect minimal data and agree on a safe work window to avoid rollbacks.
Useful kit for a walk-through:
- IR thermometer (or thermocouple probe)
- Flashlight
- Cable ties
- Marker and painter’s tape for labels
- Notebook or a phone template to note U locations
Check with operations about what’s happening around the rack: cooling setpoints (supply temperature if known), current room modes, and the row layout. If cooling settings or HVAC work changed recently, know that in advance.
Arrange a 1–2 hour window for measurements and the possibility to slide out servers or briefly stop individual nodes. Assign one responsible person to confirm which services must not be touched.
Before moving gear, follow basic safety: verify PDU labeling and power, evaluate device weight and rails, prepare fasteners and a temporary place to set equipment. Don’t pull out several heavy servers at once—the rack can tip forward. Record the order: what you removed, from where, and in which port it will be returned.
How to find the problematic U: step‑by‑step rack walk
First, identify the exact U where intake temps spike and why. A single rack walk usually takes 20–40 minutes if you follow a consistent routine.
Start with one mode: keep front and rear doors either both closed or both open for the whole inspection. Otherwise you’ll create vortices and get inconsistent numbers.
Five checks for one rack
- Measure intake temperature at the front, U by U, top to bottom. Hold the sensor at the intake zone (typically center of the front panel), not on the door or side.
- Check exhaust at the rear. Look for places where hot air clings to the rear door, leaks through gaps, or returns to the front through slots and empty U.
- Mark devices with nonstandard intakes: side, bottom, or through perforations. They often heat neighbors.
- Compare neighboring U, not just absolute values. If one U is 3–6°C higher than its neighbors under similar load, that’s almost always a local cause.
- Cross-check your observations with server inlet sensors. If the server reports a high inlet while your front measurement looks “normal,” you measured in the wrong spot or air is being pulled through a bypass.
How to quickly infer the cause
If the front intake fluctuates while the rear is evenly hot, recirculation through empty U, door gaps, or cable entries is often to blame. If the rear is locally very hot, look for a point exhaust issue: cable "carpet," a dense server without blanking panels, or a device blowing directly into a neighboring intake.
Example: two 1U servers in the middle of the rack show inlet temps 7°C higher than adjacent U. At the rear, cables block part of the exhaust, hot air spreads sideways and is drawn forward through empty U. Often this is fixed by moving equipment and tidying cables.
Rack map: how to record results so you don’t lose the picture
After measurements, a rack map is more valuable than isolated numbers: it helps decide what to move, what to close, and what to recheck.
Make a simple rack schematic on paper or a spreadsheet: 42 rows (U) and a few columns. Mark where each device’s intake (usually front) and exhaust (usually rear) are. Highlight devices with side airflow.
What to log
A minimum that prevents getting lost:
- U or U range (e.g., 18–20U)
- device (model or short name) and role (server, switch, UPS)
- approximate power or load (even rough)
- intake and exhaust temperatures (measured the same way)
- notes: cables, gaps, empty U, loose door, removed panels
After the first pass, don’t argue over tenths of a degree. It’s important to see where values stand out and where the vertical profile “breaks.”
How to mark quick wins
On the map note items you can fix without moving heavy gear: empty U without blanking panels, gaps in side rails, cable bundles blocking intakes, open rear openings, or a poorly closing door.
Set your alarm threshold according to your policy: an inlet limit or margin to the emergency threshold. The key is that the criterion can be repeated after changes.
Rearranging equipment without changing data center cooling: 5 tactics
Don’t rush to alter the HVAC. Often careful rearrangement and a few small fixes done in a day are enough.
1) Move the hottest unit where airflow is better
Better cold air is often available lower in the rack. Move the most power‑hungry server to the cooler area, starting with free U within the same rack.
2) Spread heavy devices vertically
Avoid stacking several hot servers in a compact block. Leave a 1U buffer or a lighter device between them when possible.
3) Eliminate internal recirculation
Hot air often returns to the intake through gaps. Check empty U, large cable openings, and loosely closed doors. Closing these "windows" reduces hot-air intrusion and stabilizes intake temperature.
4) Swap heavy and light devices
If a high-performance server sits in the middle of a warm zone, try moving colder devices (switches, KVM, small servers) above it while placing the hot source lower. The goal is a smooth temperature gradient without 2–3 U peaks.
5) Check what blocks airflow
Slide rails, deep shelves, and poorly routed cables can partially block airflow. Keep heavy equipment lower and ensure mounts and accessories don’t form a "wall" in front of fans.
After any change, wait 15–30 minutes and recheck the problematic U. That quickly shows what worked.
Air inside the rack: blanking panels, cables, doors and short paths
Even with proper room cooling, hot spots often appear because air inside the rack flows the "easy" way, not the intended way. Cold air doesn’t reach some servers, and hot air returns to intakes.
Blanking panels and empty U: results in minutes
Empty U between servers are not just "holes." Hot rear air easily moves forward through them and mixes with neighboring intakes. This is especially critical in the middle and top of the rack.
Simple test: install blanking panels in the most problematic empty spaces and compare inlet temps after 10–20 minutes. Often inlet drops 2–5°C without moving hardware.
Cables, doors and brush strips: where short paths form
The most common cable-management mistake is bundles blocking front intakes or rear exhausts, or forming a "curtain" that interferes with vertical flow. Another problem is gaps: loosely closed doors, missing brushes at cable entries, or side panels not seated. Through these gaps, air circulates in a loop and the rack "feeds itself" hot air.
Quick no‑shutdown test:
- Ensure front and rear doors fully close.
- For 15 minutes, move large cable loops away from intake and exhaust zones.
- Temporarily seal large gaps with brush strips or adhesive fillers.
- Install 2–3 blanking panels in empty U next to problem servers.
- Compare intake temps and fan speeds before and after.
Side intakes and neighbors
Devices with side intakes (some network gear and storage) easily heat neighbors if placed tightly. Give them side clearance: leave a gap, move them to the rack edge, or colocate less temperature‑sensitive gear nearby. If U space is limited, moving them to a level with fewer cable bundles sometimes helps.
If you need to stabilize temperatures in 1–2 days, start by eliminating short air paths. Subsequent rearrangement is faster because the main causes of hot-air return are already removed.
Common mistakes that make hot spots come back
The worst situation is fixing it, then seeing overheating again a week later. Usually this is not one big mistake but several small ones.
The first mistake is moving equipment and not rechecking the same way. If you measured inlet at specific U, repeat measurements there and at the same times (before and after).
The second mistake is leaving blanking panels incomplete. One or two gaps next to a hot unit become a short path for mixing.
The third is forgetting the rear: rails, cable bundles, PSUs, and a slightly open rear door can block proper exhaust and create recirculation right behind servers.
A bad workaround is to treat the rack only by increasing fan setpoints or room cooling. That masks flow distribution problems, adds noise and energy use, and can worsen neighboring racks.
Also, checking only during quiet hours can give a pretty picture that collapses during backups or month‑end jobs.
A short control list to avoid pitfalls:
- Measure before and after at the same U and intake points.
- Fully close empty U, especially near the hottest servers.
- Ensure cables and accessories do not block rear exhaust.
- Check during peak load periods.
Example: you spread two servers vertically and added blanking panels, and daytime looks cooler. But nightly backups push inlet temps up again. That means improvement exists, but cooling and airflow margins are still small.
1–2 day checklist: what to do and how to know it’s better
Act quickly and measure consistently before and after. Then you won’t argue whether it improved—numbers and U locations will show it.
First record the baseline: photos of the rack front and rear (showing empty U and cables), a U map, baseline intake and exhaust temps, and server sensor readings (top, middle, bottom).
Day 1: quick fixes and initial moves
Do what usually yields results within hours:
- Close obvious empty spaces with blanking panels, especially next to hot servers.
- Tidy cables: don’t cover door perforations or create a cable "carpet" over exhaust.
- Check and seal gaps: side panels, brush entries, door closures.
- Spread the hottest devices vertically so they aren’t a dense block.
- Ensure nothing blocks front intakes.
In the evening, repeat measurements at the same points. Mark on your map which U cooled and where the peak remains.
Day 2: fine tuning and load testing
Focus on the remaining 1–2 U with local peaks. Make one change at a time (e.g., move a device 2–4U or add a blanking panel) and measure again. Test under typical load, not idle.
Clear signs of improvement:
- Less temperature variation by U; no abrupt steps between neighbors.
- No local rear peaks in one rack zone.
- Fans run steadier and less often hit noisy max.
- Temperatures remain stable for 1–2 hours at normal load.
If peaks persist after two tweak cycles, the cause may be outside the rack (supply air or row balance). Then bring in an integrator to assess end‑to‑end airflow and power/cooling capacity.
Example: stabilizing a rack’s temperature in 2 days
Scenario: a 42U rack with six 1U servers packed in the middle. Logs and quick checks showed one U consistently spiking under load while neighbors stayed normal. This is a typical case: the problem is how air flows inside the cabinet, not the whole room.
The inspection revealed two causes: empty U around the dense block were open, and rear cables formed a "curtain" leaving side gaps. Exhaust air returned to the front intake.
Work was done in two short windows.
Day 1: remove short air paths
Installed blanking panels above and below the server block, tidied cables (separated power and network, tightened ties so exhaust wasn’t blocked), and ensured doors and brush entries closed fully.
Day 2: redistribute load vertically
Moved the two hottest servers apart: one moved several U up, the other down. Left a buffer U between them where the peak had been.
Verification: remeasured at the same points. The temperature profile smoothed out, the local peak disappeared, and the inlet/outlet delta became predictable.
They then set simple rules: don’t cluster all hot devices, don’t leave empty U open, and don’t block exhaust with cables. They also kept a rack map template (U, device, load, intake/exhaust, notes) to respond faster to future changes.
Next steps: monitoring and when to call an integrator
If you remove a hot spot in 1–2 days, maintaining the result is crucial. Hot spots often return after small changes: adding equipment, rerouting cables, removing a blanking panel, or changing airflow direction.
Regular monitoring: what and how often to check
A short scheduled check is better than a rare post‑incident deep dive. Use data from iDRAC/iLO/BMC, rack sensors, and intake measurements.
- Daily: alerts for CPU and inlet temps plus fan speeds.
- Weekly: quick rack inspection (empty U, cable bundles, door closure).
- Monthly: review the U map and compare with the previous month.
- After every change: equipment added, patch cords moved, door or panel removed.
Standardize what most affects airflow: blanking panels, clear cable rules (don’t block perforations or intakes), and basic placement principles by height.
When to call an integrator
Call an integrator when cosmetic fixes aren’t enough and the issue is broader. Typical signs:
- Hot spots move between racks or repeat across rows.
- Inlet temperatures rise even when the rack layout is correct.
- Fans run constantly at high speed and changes have only short‑term effect.
- You need a plan for growth: new servers, U density, or power/cooling headroom.
- You require 24/7 support and clear responsibility for maintenance.
An integrator looks at the full picture: thermal load, placement, power and infrastructure. If you are in Kazakhstan, discuss this with GSE.kz: they supply and manufacture servers and workstations and offer system integration and infrastructure support to plan changes in advance rather than react to overheating afterward.
FAQ
What exactly counts as a “hot spot” in a rack?
A hot spot is a place in the rack where the intake air to servers is noticeably warmer than in the neighboring U, while the rest of the rack and the room may be fine. It is usually caused by recirculation: hot exhaust air partially returns to the intake instead of going to the hot aisle.
Why is local overheating dangerous if “servers are still up”?
The quickest damage is reduced performance due to CPU/GPU throttling and increased application latency. Fans run faster (more noise and wear), disk and controller errors grow more frequent, and in the worst case you can see reboots or emergency shutdowns. Even if "servers don't fail yet," constant heat speeds up component aging and raises failure risk.
How to tell a local rack problem from overall data center cooling issues?
Compare levels by height and neighboring racks: when the room cooling is the problem, temperatures usually rise across many racks and especially at the top. With a local issue, a specific U range or 1–2 devices heat up while adjacent U and nearby racks remain stable.
What monitoring signs most often indicate a hot spot?
If fan speeds and inlet temps jump at normal load for several devices in one spot, that's a typical sign of poor airflow supply, not a heavy workload. Also watch for thermal events in logs and an unusually large inlet/outlet delta specifically for that group of devices.
What should I prepare before inspecting and measuring the rack?
At minimum: an IR thermometer or thermocouple, a flashlight, and the ability to safely inspect the front and rear of the rack. It helps to prepare a simple U-by-U sketch to log where you measured and what you changed, otherwise it's easy to lose the causal link.
Where exactly should temperature be measured so you don’t mistake the inlet?
Measure at the device's intake area, usually centered on the front panel, not at the door or side panel. Keep the same conditions throughout the inspection: either keep doors all closed or all open, otherwise you will change airflow and get inconsistent readings.
Is it true that blanking panels for empty U can quickly reduce temperature?
Open U spaces are one of the most common short-circuits where hot exhaust moves forward and mixes with intake air. Closing those empty U with blanking panels next to the problem area often produces measurable improvement within 10–20 minutes, lowering inlet temps and smoothing fan behavior.
Can bad cable routing cause overheating in one or two U?
Yes. Cables often form a “curtain” over the exhaust or block perforations, causing hot air to linger and return through gaps. Typically, removing large loops from the exhaust area and ensuring front intakes are clear solves the issue.
What equipment rearrangement should I do first to quickly remove the peak?
First move the hottest unit to a position where measured airflow is better, often lower in the rack. Avoid stacking several high-heat servers together. After each change, wait 15–30 minutes and remeasure at the same U to see the effect.
When should I call an integrator and what should I show them to save time?
Consider that the fix worked if there are no abrupt temperature steps between neighboring U, fans stop hitting maximum speeds without load, and readings stay stable for a couple of hours under normal load. If peaks return after cosmetic fixes or the issue affects multiple racks, bring in an integrator like GSE.kz. Provide them with your U-map, basic inlet/outlet measurements, and a list of recent changes so diagnostics can be quick and focused.