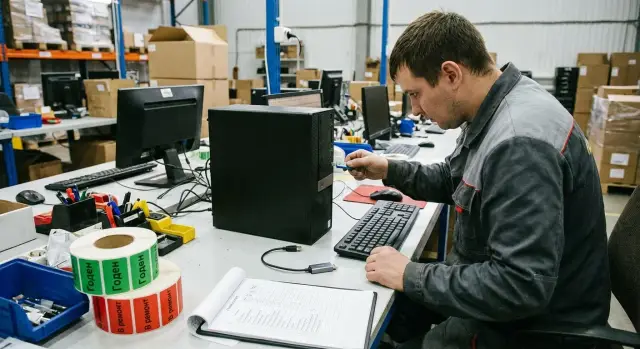
Quick USB Port Test During PC Receiving: Warehouse Checklist
Quick USB port test for PC receiving: list of test devices, step-by-step warehouse check and pass/repair criteria for a batch of computers.
What to check at the warehouse and why it matters
Ports and connectors are the issues that most often surface after a PC has been handed to a user. If you skip a short check during receiving, the problem will appear later: a workstation will stop working, correspondence will start between warehouse, IT and service, and it will be harder to prove when the defect first occurred.
You don’t need to “prove perfect operation” at receiving. The goal is simpler: confirm basic interface health — is there power, does the system see the device, and is there no obvious mechanical damage. This helps immediately separate defective units and process them correctly.
There are usually three groups of defects in batches:
-
Mechanical: the connector is loose or skewed, the plastic insert is cracked, contacts are bent, the plug fits too tightly or, conversely, is wobbly.
-
Power: the port does not supply 5V, a device does not charge, a flash drive LED does not light.
-
Contact and “intermittent” failures: the device appears and disappears, especially when the cable or case is touched lightly.
A “quick check” at the warehouse takes a few minutes without special software and without opening the case. Its purpose is to catch obvious problems and record the state at the moment of receiving.
The limitation is simple: this test does not replace service diagnostics (for example, measuring USB 3.x throughput, load testing, or searching for rare board breaks). If a port behaves unstably or there are signs of impact, a service inspection is needed.
To avoid disputes later, assign responsibilities in advance:
- Logistics is responsible for packaging integrity and absence of delivery damage.
- Warehouse records port functionality using the checklist and labels units as “Good/Repair”.
- IT confirms compatibility of test devices and basic settings (for example, whether ports are disabled by policy).
- Service performs diagnostics and decides on repair or replacement.
This workflow is especially useful when receiving large batches for government bodies, schools, or clinics, where downtime and returns are costly and documentation requirements are strict.
Which ports and connectors to include in the quick test
For warehouse receiving, two things matter: the connector is physically intact and it actually works with a simple device. Therefore, check not only USB but also connectors that are harder to prove as a factory defect later.
Minimum set for each PC (including the front panel if present):
- USB-A (rear and front)
- USB-C (if present)
- 3.5 mm audio (headphones/microphone or combo)
- RJ-45 (LAN)
- Video outputs: HDMI and/or DisplayPort
Also check power: the jack should sit firmly, without sparking, overheating or spontaneous disconnects. Front USBs often have issues due to mechanics (impacts during transport) or a loosely mounted panel.
USB 2.0 and USB 3.x can often be distinguished visually: USB 3.x commonly has a blue (or turquoise) insert, USB-C is symmetrical. Behavior gives clues too: USB 2.0 almost always brings up a mouse and keyboard, but copies files slower; USB 3.x is noticeably faster.
Symptoms that typically indicate a defect (not a settings issue):
- significant play; the connector housing moves or is recessed
- the plug only inserts at an angle and does not hold
- contact is lost when the cable is touched lightly
- the port periodically disconnects and then reappears with the same device
If a device is “not seen”, it isn’t always a repair case. Sometimes the USB is disabled in BIOS/UEFI, USB storage is prohibited by security policy, or front ports are not connected internally. For receiving, record: which port, which test device, and whether the problem repeats on another port with the same device.
Minimal set of test devices: what to keep at receiving
To prevent checks from becoming time-consuming, keep a dedicated “receiving kit” in one box. The rule: devices should be simple, familiar and identical for all shifts — that makes results less dependent on the individual.
Minimal kit that covers most checks:
- 2 USB flash drives: one USB 2.0 and one USB 3.0, both with the same test files (for example, a 1–2 GB folder and several small files)
- Wired USB mouse and wired USB keyboard (wired devices produce fewer surprises than wireless)
- A USB-C device or a good USB-C to USB-A adapter (if the model has USB-C)
- A smartphone with a reliable cable to test charging and data transfer
- A small USB hub and a short USB extension (20–30 cm) to diagnose weak contacts
Prepare flash drives in advance. A single large file shows stable read/write; small files reveal whether copying “falls apart.” If there are multiple PC types on the warehouse, label the flash drives and cables so they’re not taken to the office or swapped for random items.
The hub and short extension are not for speed but for checking mechanics and contact. If a port only works when the plug is held at an angle or connection drops with slight touch, it’s usually a reason to send the unit to repair even if it “worked once.”
Keep a spare phone cable and one spare flash drive. Often the issue is a tired cable or a dirty port on the test device.
Preparing the warehouse and rules for recording results
A check saves time only if there is a simple workspace and clear result recording. Then disputes are resolved in minutes, not “from memory.”
Allocate a separate table near the unpacking area. You need stable power (preferably via a surge protector), one verified monitor, basic keyboard and mouse, and space for stickers and a marker. Keep a tray for “suspect” units so they don’t mix with good ones.
Use one template per shift. It doesn’t have to be complex — consistency is what matters and forms should be filled immediately while the PC is on the table:
- Date/shift and tester’s name
- PC serial number (and, if available, separate serial number for the system unit/all-in-one)
- Box or pallet location number
- Port test result (brief)
- Remarks (which port, what symptom, with which device)
Limit statuses to three to avoid ambiguous interpretations:
- Good: all tested ports work, connectors intact, no play
- Good with note: works but has a nuance (tight plug, slight play, one-off error, cosmetic issue)
- Repair: port not recognized, connector damaged, repeatable contact loss
For intermittent defects use a recheck rule: reconnect the test device 3 times, try a second cable/flash drive, then reboot and repeat. If the problem occurs at least 2 out of 3 attempts — mark as “Repair.” If it does not repeat — mark “Good with note” and describe the condition (for example, “connection drops with light pressure”).
Take photos when:
- there is visible physical damage (bent contacts, crack, misaligned connector)
- a “Good with note” status could become a supplier claim
- the box or seals are damaged
Photos should show the serial number and a close-up of the problematic port.
Step-by-step USB port check in 3–5 minutes per PC
This procedure quickly filters out obvious defects: bent contacts, dead ports and loose connectors. Do it the same way for every PC so results are comparable.
1) External inspection (20–30 seconds)
Inspect each port under good light. Look for frame misalignment, cracked plastic, signs of impact and bent contacts. For USB-C, ensure the internal tongue is straight and centered.
2) Fit check without force (10–15 seconds)
Insert a test flash drive (or a mouse receiver) into USB-A and a cable/adapter into USB-C. The plug should insert evenly without pinching or pushing. A small manufacturing tolerance is acceptable, but the port should not feel like it “moves” with the board.
Important: do not wiggle the plug deliberately — that can damage even a working connector.
3) Power on and system readiness (30–60 seconds)
Turn on the PC and wait for a usable state (login screen or desktop). Preferably avoid machines in the middle of long updates or showing I/O errors.
4) Quick pass through all ports (1.5–2 minutes)
Follow a single route so nothing is missed: front USBs first, then rear USBs, then USB-C if present.
Simple check: plug in a device, observe a response (flash drive LED, mouse cursor, system notification), safely remove and move to the next port. If there are many ports, you may reuse the same test device but test each connector separately.
5) Record result immediately (20–30 seconds)
Note the outcome right away, not from memory. Minimum: port location (e.g., “front left”, “rear top”), status (OK/not detected/not recognized/visible defect) and PC serial number. This saves time in disputes and speeds up Good/Repair decisions.
How to tell the port is “alive”: signs without special software
For receiving, you don’t need perfect benchmarks — just quick signs that the connector supplies power, holds contact and transfers data. This can be done without programs or internet.
Three checks that give the most confidence
It’s better to repeat the same set of actions consistently than to stress one port to the limit:
- Flash drive: the device appears in the file manager, opens without noticeable delay, and a file copies there and back without errors. A single 200–500 MB file is enough for a quick check.
- Mouse or keyboard: operate smoothly without dropouts. Gently touch the plug at the port — there should be no reconnection sounds.
- Smartphone: it charges, and when needed the phone is recognized for data (a notification on the phone and new device on the PC usually appear).
After each connection observe stability. Intermittent contact often shows only with slight cable movement.
Catching an intermittent contact in 10 seconds
Plug in a flash drive or mouse, then gently (without force) move the cable at the port entrance by 2–3 mm. If the device reconnects, power blinks, or the file copy interrupts, mark the port as suspect.
If the case has USB 3.x, judge speed by feel: a large file copies noticeably faster over USB 3.x than USB 2.0 on a working port. Exact numbers aren’t needed — compare with a reference PC or a neighboring port.
Short rule for the warehouse worker: a port is “alive” if it supplies power, transfers data, and does not disconnect when the plug is lightly touched.
“Good” and “Repair” criteria: clear rules
To ensure consistent results across staff, agree statuses in advance. Then there’s no argument about what counts as defective versus a transient fault.
Clearly “Repair” conditions
These signs require removing the PC from the batch immediately:
- Visible mechanical damage to the port or nearby case (bent contacts, crack, recessed port, play, impact marks).
- The plug does not hold: it falls out without force or wobbles with light movement.
- Dangerous signs: sparking, burning smell, strong heating of the connector or cable when connected.
- Repeatable loss of connection or power on a proven-good device (e.g., flash drive repeatedly appears and disappears) after 2–3 attempts.
“Good” and “Good with note”
Mark Good if all tested ports reliably see devices, do not drop connections, and contact does not depend on plug position.
Use Good with note when there was a single failure (for example, the device didn’t appear the first time) but after re-inserting or testing with another known-good device the problem does not recur. Record the note so service can review during scheduled inspection.
If the cause is unclear (doubt about the cable, flash drive, or hub), do a short recheck on the spot: change test device and cable, repeat on two different ports. If the failure returns — send to repair.
Example: a flash drive dropped twice when lightly touching the plug on one PC, while the same flash drive worked normally on another PC. Mark the first unit as “Repair” rather than debating “it seemed so.”
Common mistakes when testing ports at the warehouse
Some “failures” turn out to be testing errors rather than PC defects, especially in noisy areas, when rushed, or without standardized test accessories.
Mistakes that create false failures
- Blaming the port when the flash drive or cable is at fault. If a storage device sometimes shows up and sometimes not, check it on a reference PC first.
- Testing only an easy-to-reach front port and stopping there. In batches, a particular connector often suffers (for example, the top front USB after transport), while others are fine.
- Not giving the system time to detect the device. Sometimes it takes 5–10 seconds, especially for an external disk or USB hub. If you pull the plug too soon you caused the symptom yourself.
Mistakes that actually damage the connector
You can damage a port during testing by wiggling the plug side-to-side, forcing it in, or inserting at an angle. This often happens when a connector is tight and the tester tries to “help.”
Another time-wasting issue is poor recording. Writing “USB not working” without specifying which port (front or rear, left or right, upper or lower, USB-A or USB-C, blue (3.x) or black (2.0)) is not useful.
Simple rules that prevent disputes with service and supplier:
- first test the flash drive and cable on a reference PC
- give the device time to be detected, do not tug the connector
- mark the exact port location and repeat the test with a second device
Example: in a batch of 20 PCs, flash drives “did not read” on three. After rechecking it turned out the warehouse worker had a worn cable, and on one PC the problem was only with the lower rear port. As a result, only one unit went to repair instead of three.
Situations often confused: what to check additionally
Sometimes a port seems dead but the cause is not the connector itself. At receiving, quickly separate real defects from conditions that are easy to check on-site.
“Not working” because the device itself is faulty
A quick power test is to try charging a phone from each USB port using the same cable. If the phone charges, the port supplies power and it’s not a total failure.
If a flash drive, mouse or scanner intermittently appears, do a cross-check: connect the same device to two different PCs from the batch. If the failure travels with the device, the accessory or cable is to blame.
Front ports dead while rear ports work
The front panel is often connected by a separate cable. If front ports don’t work while rear ones do, test repeatability: try the same device in both front ports and then in a rear port.
If both front ports show the same problems while the rear ports are stable, this is usually sent to repair as a front-panel/connection issue rather than a motherboard fault.
USB-C: “works only one way”
With USB-C, mistakes often come from plug orientation, cable quality, or the adapter used. Flip the plug and repeat the test. If using a USB‑C to USB‑A adapter, record which adapter was used for testing.
Ports work but speed is low
Low speed is not always a defect. Frequent reasons: the flash drive is slow, the connection fell back to USB 2.0, or power saving is enabled. Don’t mark “Repair” solely for slow copying during receiving.
Record as “conditionally good” and flag for further checking if:
- the device is detected reliably and does not drop out
- power is present (phone charges)
- the problem repeats only with one specific flash drive or cable
- rear ports are faster than front ones (different port versions possible)
If low speed is accompanied by disconnections, contact instability, or periodic device disappearance, send to repair.
One-page short checklist for the warehouse worker
This sheet helps quickly mark each port and decide whether to accept the PC or send it to repair. Handy when many identical machines are at the table.
Checklist (mark per PC)
- Visual inspection: connector straight, not skewed, internal contacts not crushed, case around connector not cracked.
- Mechanics: plug inserts with normal effort, connector does not wobble, no play when lightly rocked.
- Device detection: insert a flash drive (or another simple USB device) and confirm it appears in the system.
- Copying: copy a small file to and from it (e.g., 200–500 MB). There should be no errors or hangs.
- Stability: during copying lightly touch the cable or flash drive. There should be no disconnects, reconnection sounds or device disappearance.
Always test connectors in the same order: left to right on the front panel, then the rear. If many ports exist, mark tested ones with a dot on protective film using a marker.
Result recording (required)
Fill a mini-log for each port and set an overall status:
| Port | Result | Note |
|---|---|---|
| USB-A front 1 | OK / FAIL | play / not detected / drop |
| USB-A front 2 | OK / FAIL | |
| USB-A rear 1 | OK / FAIL | |
| USB-C (if present) | OK / FAIL |
Final rules:
- Good: all tested ports OK, copying completes, no disconnects.
- Repair: at least one port FAIL (not detected, drops when touched, visible deformation, large play).
- Disputable: port works but has instability or mechanical defect. Practically it’s better to mark “Repair” and attach a photo.
Labeling: place a status sticker on the case (GOOD or REPAIR) and include a photo of the defective connector if sending for repair. This saves time when resolving disputes.
Practical example: receiving a batch and resolving disputes
Batch: 30 office PCs. Two people and one set of test devices (USB 3.0 flash drive, simple USB keyboard, USB mouse, USB headset or USB sound card, short USB-A to USB-C cable and a phone/power bank as load). Goal: do not slow down receiving and immediately separate boxes that may need repair.
Organization was almost conveyor-like. The first person unpacked only enough to access ports and power on the PC, then made a quick pass of front and rear USBs. The second recorded results in the log and applied a status sticker to the box.
To keep suspect boxes separate, they assigned zones and a simple color code on stickers:
- Green: all ports OK, box goes to the common stack.
- Yellow: anomaly, needs recheck at the end of the shift.
- Red: clear defect, box goes to quarantine immediately.
- Gray: could not check (no power at station, wrong cable) — move to a separate table.
Example entry: “PC-12, rear top left USB - power drop.” The device appears intermittently and the phone does not charge from that port. An adjacent port worked reliably, so the cable was not to blame.
Another borderline case went to yellow: on a front USB 3.0 the flash drive was detected but dropped when lightly moved. A second device confirmed connector play.
Batch result: 26 PCs marked Good, 3 to Repair (2 with USB power issues, 1 with mechanical play), 1 flagged for recheck due to a dubious front connector. Receiving did not stall: red boxes were removed and suspects did not block moving others to inventory.
Next steps after receiving: inventory, service and prevention
After testing the main task is to keep results and quickly separate "working" from "disputed". Otherwise the issue will surface at the user and take longer to resolve.
Inventory: tie each PC to its result
Record results by serial number and model, not by box. A simple table or form is enough: date, tester name, list of ports, status (Good/Repair), short comment (e.g., "USB-A front: play", "USB-C: device not recognized").
It helps to split flow into two zones: “ready to issue” and “quarantine.” For disputable units, label the box with what failed and which test device was used.
Service: avoid long repair times and disputes
Agree with service and procurement in advance what counts as a defect and what is acceptable (for example, a tight connector that works reliably). This prevents warehouse staff from deciding subjectively.
On receiving day keep a short action list at hand:
- open a service ticket with serial number and symptoms
- attach photo/video if the defect is intermittent
- do not try to force or “work in” the connector
- store quarantined PCs separately so they don’t mix with good ones
If you buy PCs or servers and need reliable local support in Kazakhstan, it’s often convenient to work with a manufacturer or integrator that has its own support. For example, GSE.kz manufactures computers and servers in Kazakhstan and provides round-the-clock technical support through a service network.
Prevention: control after deployment
After 2–4 weeks of operation it’s useful to do selective rechecks (for example, 5–10% of the fleet), especially in call centers and places with frequent reconnects. This helps catch early failures and understand which ports fail more often and why.
FAQ
Which ports must be checked when receiving PCs at the warehouse?
Check that the connector is intact, supplies power, the system sees a simple device, and the connection doesn't drop with a light touch. In practice, USB-A/USB-C (if present), 3.5 mm audio, RJ-45 and video outputs are enough — these are the interfaces that most often cause disputes after a PC is issued to a user.
How long should a quick port test take?
Aim for 3–5 minutes per PC if the workspace is ready and test devices are at hand. Longer time is usually needed only for “floating” cases where you must repeat connections and exclude cable or flash drive problems.
Which test devices are best to keep at the warehouse?
Keep a dedicated “receiving kit” that is not used in the office: wired mouse and keyboard, two flash drives (USB 2.0 and USB 3.0) with prepared files, a verified phone cable, and a USB‑C adapter if needed. This reduces false failures caused by worn cables or random accessories.
How can I quickly tell that a connector is mechanically damaged?
First visually inspect the port in good light: misalignment, cracks, recessed port, or bent contacts are immediate reasons to record a defect. Then insert the plug gently: it should go in straight and hold firmly, without the feeling that the port moves with the case.
What is a “floating” contact and how do you catch it during receiving?
The simplest sign is that the device appears and disappears when reconnecting or when the cable is moved slightly at the port entrance. If the problem repeats on a known-good device, send the PC to service even if it worked once.
If a flash drive is not detected — is that immediately a reason to send the PC to repair?
Give the system a few seconds to detect the device, then do a short cross-check: plug the same flash drive or mouse into another port and, if possible, into a reference PC. If the failure "moves" with the flash drive or cable, the accessory or contamination is usually to blame, not the port.
Why do front USB ports sometimes appear “dead” while the rear ones work?
Usually this indicates an issue with the front panel or its connection rather than all ports. If both front ports behave the same poorly while rear ports work reliably, mark the unit for service as a front-panel/connection issue rather than a motherboard-wide fault.
What “good” and “repair” criteria should the warehouse adopt?
Use three statuses: “Good”, “Good with note”, and “Repair”. Mark as “Repair” for repeatable disconnections, lack of power, clear mechanical damage, or dangerous signs like overheating; “Good with note” for a one-off failure that does not reproduce after retesting and where the mechanics are acceptable.
How to correctly document test results so there are no later disputes?
Record by serial number: who tested, date/shift, which port was tested with which device and what symptom occurred. If the defect is visible or disputable, take a photo showing the serial number and a close-up of the problematic connector — this speeds up resolution with service and supplier.
Who is responsible for what: warehouse, IT, logistics and service?
Warehouse documents the state at reception and labels the units, logistics is responsible for delivery integrity, IT helps rule out configuration limits, and service performs diagnostics and decides on repair or replacement. If you buy PCs in batches and need clear support in Kazakhstan, agree the acceptance procedure beforehand with the manufacturer or integrator, for example GSE.kz, which has production and a service network.