Point Cloud Processing in ReCap Pro: Plan from Scan to Model
Point cloud processing in ReCap Pro: plan for import, registration and cleaning, disk and network requirements, and quality checks before modeling.
What “from scan to model” means and where quality is lost
The phrase “from scan to model” describes a simple chain: you bring raw data from the scanner, assemble it into a single point cloud, clean and organize it, and deliver it to CAD or BIM so geometry can be modeled and decisions made easily. If accuracy or context is lost at any step, the model will later be built “by guesswork.”
A good result is usually recognized by three signs: a clear and verified registration accuracy, sufficient coverage without gaps in key areas, and a cloud where the required surfaces are readable (while noise, people, vehicles and random objects don’t interfere).
Deadlines most often break not at import but in three places: registration (especially with weak overlaps), cleaning (when it wasn’t agreed in advance what to remove), and storage/exchange (when a heavy project is constantly copied between drives and people).
What files come out and who needs them
At the end you typically have a project file for working in the Autodesk ecosystem and indexed point cloud data, plus exports to neutral formats if the cloud moves to another team.
Different participants need different things. A BIM specialist needs zones and clear georeference, a CAD designer needs readable geometry and correct units, and the client needs a verifiable accuracy report and a clear list of delivered data.
Decisions to make in advance
Before processing starts, agree on things that are most expensive to redo: level of detail (what to model precisely and what to simplify), zone boundaries, coordinate system and units, output format and naming rules.
Practical example: if only structural elements and MEP runs need modeling for a hall, there’s no point keeping and delivering the full noise floor over the entire volume. But it’s important to define in advance what is “important,” otherwise cleaning becomes endless revisions.
Before scanning: accuracy, zones and shooting rules
Start not with the scanner, but with the question of what accuracy is actually needed. Floor plans and bulk volumes often tolerate centimeter accuracy. For MEP installation and connections with existing structures you may need millimeters. The higher the accuracy target, the more setups, overlaps and control you must plan.
Sketch the station plan by zones: where are blind spots, which surfaces glare, where is lots of glass or narrow passages. Basic rule: each area should be visible from at least two stations, and neighboring scans must overlap confidently. With few overlaps, registration becomes a lottery: shifts appear, “waves” on walls and voids in corners.
Georeferencing is not always required. A local system is fine if the model is for a single building without geodetic ties. Control points and marks make sense when:
- the object is large and scanned on different days or by different crews;
- scans must be combined with BIM, survey or geodata;
- there are long corridors and repeating rooms where it’s easy to drift along an axis;
- precise level marks (floor, ceiling, axes) are important.
Agree on metadata in advance, otherwise confusion will follow. Minimum: date and shift, object and floor, zone/room, station numbers, instrument height, operator name and notes on issues (people in frame, closed doors, reflective surfaces).
Simple example: in a hospital divide a floor into “wing A/B,” give each wing its own station numbering and require a photo of the zone entrance. This saves hours later when you need to find why walls don’t line up in a corridor.
Preparing data after shooting: tidy files
Before opening ReCap Pro, tidy the raw data. It’s boring but saves time: you find positions faster, avoid mixing repeat shots and can explain where the final result came from.
Start with a simple folder structure that works equally for small and large sites. A handy principle: object -> date -> zone -> scanner position. For example: Project_Atyrau/2026-01-scan/Zone_B/Pos_012/. If there are photos, keep them next to the matching position or in a zone folder using the same position code.
Next — consistent names and versions. The file name should make clear the zone and position and which pass it is. Suffixes like R01, R02 help for retakes and note when settings changed.
Before any conversions do a quick completeness check. It’s better to catch problems immediately while the team still remembers site conditions:
- reconcile the number of positions with the log and folders;
- open a few files from each zone at random;
- check for duplicates and copies in different locations;
- note nonstandard cases (moved targets, blocked zones, dark scans);
- record what is considered raw and what is already processed.
And always make a backup of the raw data before any actions. Do not rename or move original files without a copy. A separate RAW_READONLY folder or a dated archive protects against accidental edits and helps if processing must be repeated from the same inputs.
Import and project creation in ReCap Pro
Import sets the foundation for all further work. If you get units, orientation or project structure wrong at the start, errors will surface later during registration, cleaning and export. Good rule: one project = one object or a logically coherent survey stage.
When creating a project choose import settings that match the real scanner data and the team’s agreements. If sources are mixed (different scanners or days), note this in the project name and in the source folders so you don’t hunt for the “correct version” later.
Before you consider import complete, check basics:
- units (meters or millimeters);
- scale against a known size (opening, column spacing, corridor length);
- orientation (which way is “up,” where is the main façade, north if needed);
- georeference if required (coordinates should not “fly away” due to a wrong system);
- dataset composition (all stations present, no empty or duplicate positions).
Right after import assess coverage. You don’t need perfection, but you do need a quick answer: are there critical gaps in zones that cannot be inferred later? If a corridor is dense but niches with MEP routes are empty and those niches are needed, spot this now and send the crew back while it’s still easy.
Also save intermediate project versions: after import, after scale/orientation checks and after major changes. That makes rollbacks minutes not days.
Scan registration: step-by-step process
Registration assembles individual setups into a single cloud so walls, columns and equipment align without duplicates. Practical approach: rough assembly first, then refinement.
Start with a rough registration using overlaps and the walk sequence. If you scanned a floor by corridor, connect neighboring stations sequentially (A to B, B to C), rather than trying to “bridge” across the whole object. Automatic registration works well where there are enough shared details.
Then refine ties. Don’t only look at the big picture — inspect problem spots: long corridors, repeating rooms, glass, shiny surfaces, areas with people. False matches often appear there. Bad ties are better removed than kept “just in case,” as they pull adjacent stations out of alignment.
What to check during refinement
Quick checks that catch most errors:
- sufficient overlap between the pair of scans;
- no “step” on the floor or ceiling at the joint;
- thin elements (handrails, cable trays, pipes) don’t split into doubles;
- verticals line up, especially in stairwells;
- the scene hasn’t shifted because of one problematic node.
If georeferencing is required, do it deliberately: via control points/marks or measured controls. After tying, perform a final optimization and check key sections (along and across a corridor) to exclude accumulated error.
Recording decisions
Don’t keep registration logic “in your head.” Write down which pairs or groups were removed or kept and why (low overlap, people in frame, glass, repeating geometry). This helps when a project returns after a week or another specialist takes over.
Cleaning and cropping the cloud: practical techniques
Cleaning starts not with deleting points but with answering what you plan to model and what is definitely not needed. Chasing a “perfect picture” easily leads to cutting reference elements that later help modeling.
Start by removing dynamics: people, vehicles, carts, open doors, running equipment. These objects create duplicates, trails and make walls and openings hard to read. Good habit: first hide a suspicious area, check neighboring stations, then delete.
Cropping is almost always preferable to point-by-point cleaning. If the object is a building floor, keep only it and a small context around it. Trim by height too: ceiling MEP isn’t needed if you model only architecture, and vice versa. This reduces project weight and speeds navigation.
Noise and ghost reflections usually come from glass, polished metal, mirrors and wet surfaces. They appear as blurred clouds in the air or points hanging behind a surface. Work in short iterations: select an area, view from multiple angles, remove, and recheck contours.
Practical order:
- save a project version before cleaning;
- crop the cloud by zones and height, leaving only useful parts;
- remove dynamic objects as large fragments;
- clean problem materials and delete hanging points;
- finally check key elements (corners, openings, columns, axes).
Mini-scenario: in a lobby a delivery cart moved through during scanning. If you delete it point-by-point without cropping the area, you may accidentally damage a nearby glazed façade. Usually it’s faster and safer to crop the lobby by bounds and height, remove the entire delivery fragment as one piece, then fine-clean the glass by the doors.
Main rule: cleaning must be reversible. Keep the original, track versions and don’t delete anything not checked in the context of neighboring scans.
Preparing for modeling: segmentation and export
Before modeling it’s important to turn one big cloud into understandable working sets. This speeds work, reduces errors and helps different teams not interfere with each other.
Segment by how the model will be built and checked: floors, rooms, buildings, site areas. For buildings, a “floor + zone” scheme often works (e.g., wing A, 2nd floor); for industrial sites use “unit + pipe rack + adjacent zones.” Set boundaries to match the logic of future drawings and tasks.
How to cut the cloud into working sets
Usually three steps are enough. First separate large entities (building 1/2, exterior/interior, site/building). Then split by floors or levels to avoid height confusion. After that assign responsibility zones: rooms, shafts, corridors, MEP nodes, façades.
Leave a small tolerance at zone joins so the model has no gaps. Before export, check that filters and crops did not remove reference elements: columns, room corners, alignment points at openings.
Export and checks so nothing is lost
After export do a short control:
- the file name includes object, zone, date and version (v01, v02);
- accompanying notes list the coordinate system, units and scan exceptions;
- dimensions checked by 2–3 clear distances (corridor width, column spacing);
- density in key places is sufficient (nodes, openings, flanges);
- the export opens for the recipient without shifts or voids.
One naming template for the whole team saves hours and reduces the risk that different departments model based on different cuts.
ReCap performance: how not to hit slowdowns
Initial steps usually go fast, but then stations are added, density grows, photos appear and the project gets heavy. It’s important to realize early whether the limit is skill or data volume and workflow.
How to tell the project is too heavy
Symptoms repeat:
- the project takes a long time to open and “thinks” when saving;
- scene rotation stutters, point picking lags;
- cropping, hiding and region selection become noticeably slower;
- any change triggers long recalculation;
- increased risk of crashes when switching modes or filters.
If 2–3 of these match, change tactics.
Acceleration methods that help
Work in parts: one area for cleaning, control zones with overlaps for registration checks. First remove obvious rubbish and unnecessary zones, then do fine cleaning. This reduces data ReCap constantly recalculates.
Adjust display quality for the task. For checking discrepancies smooth navigation matters more than point beauty. For cleaning it makes sense to temporarily increase quality in a small area, not the whole project.
Plan heavy operations stepwise: save control versions (after registration, after major cropping) and run long recalculations at the end of a work block so you don’t sit waiting.
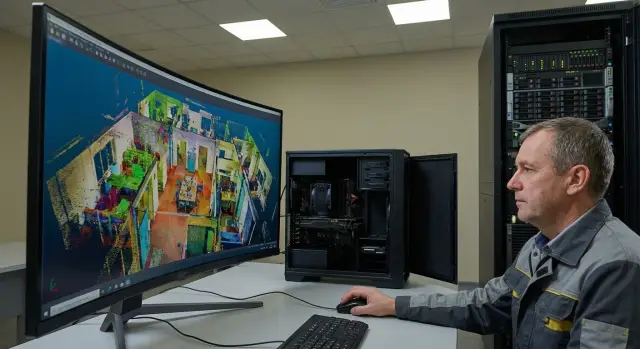
ReCap workstation requirements
Usually the limitation is not “power in general” but specific bottlenecks: recalculations during registration, speed handling large files, and how fast the system serves data to the application.
CPU: frequency matters, but cores help
High single-core frequency matters for registration and recomputations. At the same time 8–12 cores are useful when background tasks run (indexing, export) and you don’t want to freeze your workstation.
RAM: size it to the project and keep headroom
Memory is consumed quietly: a large project, multiple views and filters and the system begins writing temp files. Practical estimates:
- small objects (up to 20–30 scans): 32 GB, 64 GB is more comfortable;
- medium projects (30–80 scans): 64 GB, 128 GB more comfortable;
- large projects (80+ scans, high density): 128 GB and up.
GPU: helps viewing, stability matters
The GPU mainly speeds navigation and display (rotation, zoom, sections). It’s usually not critical for registration result, but stable drivers and sufficient video memory are important. If the viewport stutters or shows artifacts, start with drivers and check for overheating.
In teams it’s often better to equip 1–2 powerful stations for registration and export, and leave other machines for viewing and coordination.
If you procure workstations for these tasks, integrators like GSE.kz can usually pick a configuration based on real cloud sizes and workflows, not abstract “average” recommendations.
Disks, storage and network: keep the project intact
In large projects issues often start not in ReCap but on disks and network: projects open slowly, caches grow, files get lost, and people edit the same data. Plan storage as carefully as you plan the survey.
Disks: NVMe, capacity and a cache sandbox
A fast local NVMe is needed for active work. It accelerates import, index building and operations on many small files. Allocate space with margin: besides sources and projects, temp data and cache will grow.
Practical rule: keep at least 2–3x the active working set on local NVMe. If the active part is 300 GB, a 1 TB working area and cache looks reasonable.
Storage layout: avoid losing data
A simple scheme works well:
- a read-only “gold” source;
- a working area for projects and interim results;
- an archive for final versions, QC reports and exports;
- clear names: date, object, zone, version (v01, v02), owner.
The point is to avoid scattering sources and accidental overwrites.
Network and shared storage: 1GbE vs 10GbE and version rules
1GbE is often enough if the active project lives locally and the server stores sources and archive. 10GbE makes sense when several people pull large sets simultaneously, when projects are worked on directly from NAS/SAN, or when you need to quickly distribute data to workstations.
On shared storage decide in advance who can change what. Avoid two people opening the same project and diverging in versions. A simple rule helps: one project owner during registration and cleaning, others work from copies or exports.
Quality control checklist
After registration and cleaning it’s easy to relax and hand the cloud over to modeling. But small shifts often surface here and later become skewed walls, mismatched floors and extra hours of fixes.
Numerical checks: what to look at
Start with registration metrics: final error, spread across ties, number of weak links. Compare risky areas (corridors, stairs, long façades, repeating geometry) with others. If some scans rely on 1–2 ties or one place has noticeably worse error, return that area for adjustment.
Visual checks: what is visible immediately
Open several control viewpoints and look for typical signs:
- double contours on corners and pipes;
- steps on walls, floors or ceilings;
- jumps in height between floors or platforms;
- mismatches at door openings and columns;
- trembling of thin objects (handrails, cable trays).
For repeatable control keep a short quality protocol: what was checked, where, with what tools and which tolerances were accepted (different tolerances for architectural base vs MEP installation). Include date, project version, responsible person and a list of constraints: “no access to shaft,” “part of façade blocked by equipment.”
Before delivery ensure the dataset is in the agreed form: file format and version match, needed zones not cut out, orientation clear (where is north, where is zero), units match, and naming and project structure are readable without extra explanation.
Typical example and next steps to organize the process
Scenario: as-built survey of an operating clinic. To avoid disruption divide the site into zones: entry and lobby, floor corridors, offices, technical rooms, stairs. Each zone is scanned in bundles of stations with clear boundaries and overlaps on shared references (door openings, stair flights, MEP nodes).
In practice deadlines slip because decisions are made on the fly. Changing zone boundaries after scanning forces re-registration and re-checking joints. Saving on overlap between zones raises the risk of weak ties and long manual fixes. Mixing raw scans, interim versions and final data in one place almost guarantees confusion.
A robust working order:
- fix zones and minimum overlap (for example, 2–3 common stations between neighboring zones);
- version statuses: RAW, REGISTERED, CLEAN, EXPORT;
- decide in advance where auto-alignment is acceptable and where control points are required;
- assign a person responsible for registration and QC so there aren’t conflicting truths about a zone.
Delivery to modelers should be predictable. Along with exports provide a short note: coordinate system, units, tolerances, which zones are final, where there are gaps (closed rooms, reflective surfaces), and what you cleaned (debris, people, vehicles). This reduces returns and questions.
From here everything depends on rules and infrastructure: where the golden version is stored, how backups are arranged, and what workstations are needed for registrars/cleaners and for modelers. If you address this comprehensively, GSE.kz as a manufacturer and integrator in Kazakhstan can help select workstations and server parts, and provide ongoing support.
FAQ
What does “from scan to model” mean in practice?
This is the full path from the scanner’s raw files to a point cloud that can be used in CAD/BIM without surprises. Quality is most often lost during registration (poor overlaps, false matches) and during cleaning (when useful reference surfaces are removed or cleaning is done without agreed rules).
How to understand what accuracy is needed and avoid wasting time?
Agree on the target accuracy for the task and build it into the station plan: the closer you need to get to millimeter accuracy, the more overlaps and control checks are required. On site, keep the rule “each area visible from at least two stations,” and after import immediately check scale against a known dimension so you don’t carry an error forward.
Why does scan registration often drift and how to prevent it?
Scan with confident overlaps and don’t try to “jump” long distances when assembling: connect neighboring stations in the order of walkthrough. Problematic ties are better removed and the node reassembled than left in place — otherwise they pull the whole area and create “waves” on walls and duplicate contours.
When is georeferencing needed and when are local coordinates enough?
Use a local coordinate system if the model is only for a single building and will not be integrated with geodata. Georeferencing is justified when the site is large or scanned on different days/by different crews, when you need to match scans with BIM or survey data, or when accurate level marks are important.
How to organize the “raw” data after scanning so you don’t drown in files?
Organize the raw files before import: consistent folder structure, clear file names, marks for repeat scans and a quick completeness check against the log. Always make a read-only backup of the raw data and do not rename originals without a copy, so processing can be repeated and the source of results explained.
What must be checked immediately after importing into ReCap Pro?
Check units (meters/millimeters), the up/down orientation, a basic scale against a known size, and that all stations are present with no empty or duplicate positions. Before detailed work, quickly assess coverage of key zones and, if there are critical gaps, plan a re-survey while it’s still feasible and inexpensive.
How to clean a point cloud without deleting important parts or bloating the project?
Start cleaning by removing dynamic objects and doing a coarse trim by zones and height, then move to point-level cleaning. If the goal is architecture, don’t keep ceiling MEP; if the goal is MEP, trim architectural ceiling elements. This reduces project weight and speeds navigation without risking removal of reference features needed for modeling.
How to segment a cloud and prepare exports for CAD/BIM?
Usually you cut the cloud by floors and responsibility zones with a small overlap at joints to avoid gaps in the model. Before export, do a short check: file name contains object/zone/version, units and coordinate system are documented, and 2–3 clear dimensional checks (corridor width, column spacing) are made to catch shifts before handing off to modelers.
What to do if ReCap Pro starts slowing down on a large project?
Signs include long open/save times, stuttering scene rotation, delays when picking points, slower cropping/hiding/selection, and longer recalculations after changes. Work in parts: early trimming, separate areas for cleaning, control zones for registration checks, and schedule heavy recomputations and exports at the end of work blocks with versioned saves.
What workstation and storage are realistically needed for ReCap Pro?
ReCap benefits from a fast local NVMe and sufficient RAM: memory is consumed quietly, and when it runs out the system starts using temp files and performance drops sharply. Base hardware choices on the real size of your point clouds and team processes; in Kazakhstan, integrators and vendors like GSE.kz often help align configurations for registration, cleaning and export rather than just viewing.
How to quality-check results quickly — what numbers to look at?
Check final registration metrics: overall error, spread across ties, and the number of weak links. Compare risky areas (corridors, stairs, long façades) with the rest. If some scans rely on only 1–2 ties or one area shows much larger error, return that area for rework rather than letting it introduce systematic shifts into the model.
What visual checks reveal problems immediately?
Open several control views and look for common visual signs: double contours on corners and pipes; steps on walls, floors or ceilings; height jumps between floors; mismatches at doorways and columns; and trembling thin objects like handrails and cable trays. Keep a short QC log: what was checked, where, with what tools, accepted tolerances, date, version and responsible person.