Minimal on‑prem Kubernetes architecture without paid subscriptions
A walkthrough of a minimal on‑prem Kubernetes architecture: CNI, Ingress, registry, monitoring, and basic server and network requirements for a stable cluster.
Goal: deploy Kubernetes on‑prem without paid subscriptions
Organizations choose on‑prem Kubernetes when data control, predictable deliveries and cloud independence matter. Kubernetes handles containers and keeps them running, but it’s only part of the picture. Without a basic surrounding architecture you’ll quickly end up with manual workarounds: mysterious network failures, no proper service publishing to the outside, chaos with images and blind spots in monitoring.
Paid subscriptions usually don’t provide "magic" so much as a set of ready answers to common problems. Typically that includes a tested CNI, load balancing for services, Ingress and TLS, a private registry, monitoring and alerts, security policies, updates and support. Almost all of this can be covered with free components if you accept that integration and operational processes will be your responsibility.
For the first release, don’t spread yourself too thin. A basic set that makes the cluster suitable for daily work is enough: CNI, Ingress with an external IP, private registry, monitoring with metrics and alerts.
Boundaries are simple: no complex multi‑cluster, no service mesh, no “platform as a product.” The goal is to build a minimal, resilient foundation that you can later extend with security, logging and update processes.
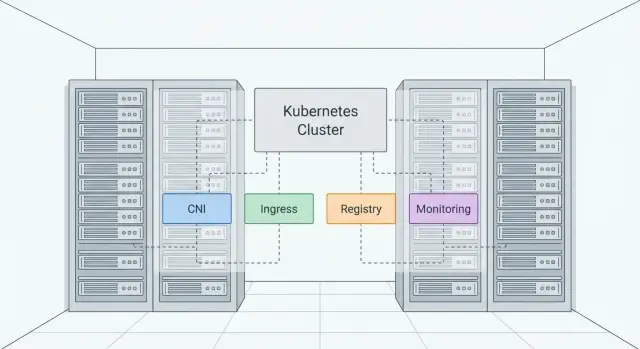
Minimal stack: what must be in the cluster
A minimal on‑prem Kubernetes architecture is not just "install Kubernetes" — it’s assembling a small set of mandatory pieces without which the cluster becomes brittle.
The base always consists of the control plane and worker nodes. For resilience plan for at least three control‑plane nodes (or one at the start with a clear expansion plan). Worker nodes typically start at 2–3 so the cluster survives a single failure.
Next come components without which operations usually turn into improvisation:
- CNI — pod networking and network policies.
- Ingress — service publishing and TLS handling.
- Registry — image storage and version control.
- Monitoring — visibility into nodes, pods and the control plane.
Things often added too early but usually postponable until real need arises: service mesh, a GitOps platform, distributed storage, complex IAM and fine multi‑tenancy. Early on they more often introduce new failure points than value.
Where on‑prem commonly loses resilience: network (MTU, routing, flapping ports), DNS (internal resolution and caching), storage (unclear volume classes and insufficient IOPS), updates (no test environment or rollback procedures). Choose the minimal stack so each part can be updated and diagnosed independently.
A good rule: if you can’t quickly explain a component to the on‑call engineer and can’t check it is alive with one command, it’s probably unnecessary right now.
Server requirements: basic guidelines for the cluster
The main on‑prem risk isn’t "not enough hardware" but that a single failure takes down half the platform. Therefore a minimal resilient setup is 3 control‑plane nodes (etcd and control components) and 2–3 worker nodes for applications. One control‑plane node is acceptable only for a dev/staging sandbox.
CPU and RAM should be estimated from reality: how many services run concurrently and where peak load occurs (e.g., month‑end reports). As a starting point for a small production cluster:
- Control plane: 4–8 vCPU and 16–32 GB RAM per node.
- Worker: 8–16 vCPU and 32–64 GB RAM per node.
- Headroom: keep 20–30% free resources so the cluster survives restarts and maintenance.
Disk is often the bottleneck, especially as metrics and logs accumulate. Prefer separating (at least logically, preferably physically) disk roles: OS, container runtime data (containerd/Docker), and a separate fast volume for monitoring data. If you use local storage for stateful workloads, disk requirements increase sharply: NVMe and a clear backup strategy become mandatory.
RAID matters because you can’t "swap a cloud disk." System disks typically use RAID1; data and metrics benefit from RAID10 (or an equivalent for performance and reliability). Verify your recovery strategy if a disk fails on a node with important data.
Before installation check power and cooling: dual PSUs in servers, at least UPS for graceful shutdowns, proper rack ventilation. For organizations in Kazakhstan it’s sometimes critical that equipment and support are available locally without long delays in delivery and repair.
Network requirements: DNS, NTP, MTU and IP plan
On‑prem Kubernetes networking often breaks not because Kubernetes is complex, but due to small issues: mixed MTUs, poor DNS or drifting clocks. Standardizing a few basics makes the architecture behave predictably.
Decide in advance how you will provide load balancing and service exposure. MetalLB in L2 mode is the simplest, but it usually requires nodes and clients to be in the same L2 segment (one VLAN without routing between them). If your network is L3 and segmented, MetalLB in BGP mode is more common: VIP routes are announced via routers. This is harder initially but fits corporate networks better.
Check MTU before installing the CNI. If a link has MTU 1500 and your CNI adds overhead (for example VXLAN), packets may fragment or silently drop. Typical symptoms: some services "sometimes" fail to open, readiness probes fail and debugging shows nothing obvious. Practical rule: one MTU across links and a decided approach — overlay or not.
DNS and NTP are two services without which the cluster behaves oddly. DNS is needed not only by pods but also by cluster components (CoreDNS may query upstream). NTP is important for TLS: certificates, tokens and audit logs depend on correct time.
Before launch fix the following:
- Pod CIDR and Service CIDR so they don’t overlap corporate ranges or VPNs.
- LoadBalancer address range (if using MetalLB).
- Who and from where can access the Kubernetes API (6443) and Ingress (usually 80/443).
- Segmentation: keep admin networks separate from application networks and restrict access to required ports.
A quick test: deploy a trial namespace and verify that Ingress is reachable from the office network and API access is limited to admin hosts. Routing and firewall mistakes show up immediately.
CNI: how to choose and configure without extra complexity
CNI determines how pods see each other on the network: IP assignment, routing, Services and NetworkPolicy. On‑prem CNI is often the source of strange drops and long investigations, so pick a simple predictable solution.
If you only need pod connectivity and Services without segmentation, Flannel is often sufficient. It’s lightweight and straightforward but doesn’t help with NetworkPolicy. If you need access control between namespaces and services, Calico is a common choice: mature, good NetworkPolicy support and usually predictable on standard Linux kernels. Consider Cilium if advanced observability and more flexible policies matter, but it is more demanding on kernels and requires care during upgrades.
NetworkPolicy to include in the first release
Don’t try to "lock everything" immediately. Start with a minimal set of rules and check that services keep working:
- Default deny traffic in the production namespace and explicit allows for needed ports.
- Allow DNS (kube‑dns/CoreDNS) for all pods.
- Allow ingress controller to reach web services only.
- Allow database access only from specific application pods.
Compatibility and quick tests
Check CNI kernel/module requirements and whether eBPF or specific iptables/nftables modes are required. Lock this in as part of your OS image standard for all nodes.
Before running production workloads run basic tests: pod‑to‑pod (within and across nodes), DNS resolution, Service/NodePort behavior, and application of NetworkPolicy. A practical scenario is two test apps (frontend and backend) to confirm policies actually block unwanted traffic.
Ingress on‑prem: service exposure and TLS
Almost every cluster needs Ingress. It provides a single HTTP(S) entry: one address and routing rules instead of many NodePorts, and a clear way to manage domains and TLS. This is useful for internal portals, APIs, monitoring and any service that requires hostnames and certificates.
For a start, the NGINX Ingress Controller handles 80–90% of use cases without exotic configuration: hosts, paths, redirects, rate limits and simple auth. Alternatives (Traefik, HAProxy Ingress) work too, but NGINX is usually easier for teams that don’t want to spend a week on fine tuning.
Do TLS “as in production” from the beginning to avoid painful migrations later.
TLS: storing and rotating certificates
Certificates are usually stored in Kubernetes Secrets and consumed by Ingress. To avoid manual renewals set a single process: choose certificate source (internal CA or public), enable automated renewal (for example via cert‑manager), keep private keys only in needed namespaces and validate access policies beforehand.
How to give Ingress an external IP on bare metal
On bare metal you need a way to allocate a stable IP for entry. Typical options: MetalLB, an existing hardware L4 or a balancer provided by the site operator. A useful practice is to separate external and internal traffic by IngressClass: for example internal for employee services and external for the limited set of public endpoints. In small organizations in Kazakhstan this often means internal access for office systems and external exposure for a few services through a DMZ.
Registry: where to store images and how to operate in an isolated environment
Without a private registry the cluster quickly hits two limits: speed and control. Public registries might be unavailable, slow or rate‑limited. You also lose a single source of truth: which images are allowed, who pushed them and when.
A single internal registry accessible to all nodes and CI is often enough for a minimal architecture. Harbor is a practical starter: projects, roles, basic LDAP/AD integration, retention policies and a convenient UI. If you need something very simple, a plain Docker Registry with basic auth works, but you’ll have to implement access control, garbage collection and mirroring yourself.
Start with registry storage on a local disk on a dedicated VM or server: fewer dependencies and faster to start. When volume grows or you need higher availability, consider S3‑compatible on‑prem object storage. It’s easier to scale but adds another service to operate.
Vulnerability scanning and image signing are useful but not mandatory on day one. Often basic hygiene is enough: immutable tags, recording SBOMs where possible and a clear update process. Signatures (for example cosign) make sense once you have a regular release process and security requirements.
If internet access is limited or unstable, prepare a set of dependencies in advance: Kubernetes addon images, base application images and Helm charts. Keep mirrored projects in Harbor and update them on a schedule from a connected zone.
Before launch document at least four items: registry location, storage type, who can push/pull, and how you clean old tags to avoid running out of disk.
Monitoring and logs: the minimally sufficient set
Without monitoring and logs an on‑prem cluster becomes a gamble. You can deploy a basic stack without subscriptions and without heavy resource use.
The minimum that covers most issues: Prometheus for metrics, Alertmanager for notifications and Grafana for dashboards. This is enough to spot degradation and get alerted before users notice a failure.
Focus on what fails most often: node and kubelet status, disk usage and latency, etcd and API health, DNS and packet loss, 4xx/5xx rates and Ingress response times.
For logs a simple start is often sufficient. For a small cluster Loki (logs from pods + search in Grafana) is usually enough. For full‑feature filtering and transformations consider EFK, but it is noticeably heavier.
Make alerts concise and actionable, or they will be ignored. Typical critical alerts: disk near full, etcd unavailable or growing latency, API returning many 5xx, node NotReady, and a sharp rise in Ingress 5xx.
Agree retention for metrics from the start. A 7–15 day retention often suffices initially to investigate incidents and see trends. Metrics storage fills up unexpectedly, so set limits and check consumption given your scrape frequency and pod count.
Step‑by‑step plan: deploy the basic stack in a few iterations
To prevent the minimal on‑prem architecture from becoming a set of disjoint installs, move in short iterations and record results after each step. Main rule: one chosen installation method and repeatability (same versions, same settings on all nodes).
Start with preparation. Collect servers (CPU, RAM, disks), roles (control plane and workers), IP addresses and access in a single table. Validate the network: DNS resolves names, NTP syncs time, MTU is the same between nodes.
A sensible sequence:
- Iteration 1: Install Kubernetes (commonly via kubeadm) and verify nodes are Ready and cluster survives a node reboot.
- Iteration 2: Install CNI and verify connectivity: pod on one node reaches pod on another and ClusterIP services work.
- Iteration 3: Deploy Ingress and verify a test service with TLS: an external request reaches the application and the certificate is valid.
- Iteration 4: Deploy a registry (e.g., Harbor), configure a pull secret and verify a namespace can pull an image without internet access.
- Iteration 5: Install monitoring (Prometheus + Grafana) and verify alerts by simulating a problem (for example temporarily filling a disk on a test node).
After each iteration perform a short checklist: what changed, where manifests are stored, and how to roll back. This saves hours when you need to repeat the setup on new hardware.
Common mistakes and traps in on‑prem Kubernetes
The most common mistake is putting everything on a single node and expecting resilience. That’s OK for a test, but in production any reboot becomes downtime: control plane and workloads fail together.
Another trap is not planning control‑plane and etcd redundancy. If etcd runs on a single server or on the same disks as workloads, recovery after even a small fault becomes hard.
Networking often breaks the deployment. Pod and Service ranges are chosen ad‑hoc and later conflict with corporate subnets, VPNs or branches. The result is strange timeouts and disappearing routes caused simply by overlapping addresses.
A frequent security mistake is leaving the Kubernetes API and admin UIs broadly accessible. Even without internet, a compromised machine in the office network is enough to cause trouble.
Finally, many operators forget quota for data growth. Logs, metrics and temporary files quickly fill disks, leading to kubelet failures and unexpected restarts.
Checks that often save you:
- Separate roles: at least 3 control‑plane nodes and separate workers for resilience.
- Fix Pod/Service CIDR and verify no overlap with corporate networks.
- Restrict API access: separate subnet, firewall and least privilege for users.
- Configure retention and quotas for logs and metrics, monitor disk usage.
- Upgrade only with a test environment and a clear rollback plan.
Quick checklist before handing the cluster to teams
Before handing the cluster to teams and enabling production workloads do a quick verification. It takes an hour or two and often saves nights.
Check core supports:
- Control plane not single node: minimum 3 control‑plane nodes and workers on separate hosts.
- DNS and NTP stable: names resolve consistently and time is synchronized.
- Network predictable: MTU consistent, no packet loss and no strange fragmentation.
- Backups in place: regular etcd backups, registry and monitoring configuration backups.
- Alerts are not just decorative: at least a few basic signals and a clear notification channel.
Also agree a simple update and rollback plan: update one node at a time, pin versions, test key services, and keep clear rollback steps (etcd snapshot, manifest rollback, node version revert) without improvisation during incidents.
Example: a small resilient cluster for an organization in Kazakhstan
Typical scenario for a government office, clinic or educational institution: 15–30 internal services (portals, integrations, queues, several databases, reports), access from the local network and sometimes via VPN. The environment is closed and updates may be monthly or less frequent. Often there is a requirement for locally sourced equipment and transparent procurement.
A minimally resilient setup starts with separating roles across nodes. When control plane, Ingress and monitoring share machines, any load or failure can cascade.
A practical layout for a small on‑prem cluster:
- 3 control‑plane nodes (cluster management only, no application pods)
- 2 dedicated Ingress nodes (with fixed IPs via MetalLB)
- 3–6 worker nodes for services (with capacity headroom)
- 1 node for the registry (Harbor) and artifacts, with a separate disk/RAID
- 1 node for monitoring (Prometheus + Grafana), also with a separate disk
In the first month deploy what reduces downtime risk: CNI, Ingress, DNS/NTP, a registry for the closed environment, basic monitoring and alerts. Heavier items like centralized logs, HA for registry/monitoring and a disciplined update process can be scheduled for the quarter ahead.
You’ll know the cluster is improving when simple metrics change: monthly incident count, mean time to recovery, percentage of successful deploys, pod restart rates, disk utilization and Kubernetes API response time.
Next steps: from plan to procurement and operations
When the basic stack is defined, turn it into a short verifiable plan. Fix the first‑tier components: CNI, Ingress, load balancing (if needed), registry, monitoring, etcd backups and update rules. The fewer "later" items, the fewer surprises in the pilot.
Then prepare a specification for your cluster size. It’s easier to start from workloads and map to resources than the opposite. Discuss the network: IP plan, VLANs/segmentation, DNS/NTP access, MTU and internet or isolated‑contour egress points.
Before procurement assess supply and support risks. On‑prem problems are often about delivery times: incompatible NICs, waiting for disks or mixed hardware batches. Standardize node configurations, a list of supported components and a clear support channel.
Minimum operational decisions before production:
- Who owns the cluster and performs updates (Kubernetes and addons).
- How you store secrets and who has access.
- Where backups live (etcd, registry, configs) and how often you test restore.
- Which metrics and alerts are mandatory.
- Maintenance windows and change rules.
If you need a local turnkey provider — from servers to integration and support — consider GSE.kz (gse.kz). They are a Kazakh manufacturer and systems integrator offering workstations, PCs, servers and infrastructure services with 24/7 support through their service network.