Migration from Cisco Catalyst to Aruba CX: moving VLANs, PoE and QoS
A step‑by‑step plan for migrating from Cisco Catalyst to Aruba CX: moving VLANs, PoE and QoS, a service checklist and common mistakes.
What to migrate and why it matters
Moving from Cisco Catalyst to Aruba CX is usually not about "changing the box". The goal is simpler and more practical: replace switches, reduce support load, satisfy procurement requirements, and get a predictable network for years. Migration success depends on how accurately you move the things users don’t notice until they stop working.
It’s important to preserve not only physical connections but also the network logic. First check:
- VLANs and segmentation (who can talk to whom)
- trunks: native VLAN and the list of allowed VLANs
- PoE: total power budget, port priorities and behavior under overload
- QoS: traffic marking and priority for voice, video and critical services
- service settings: management access, NTP, SNMP/monitoring, logs
You’ll know the migration worked by business signs: phones aren’t distorted, video calls don’t drop, printers print, 1C/CRM opens as usual, Wi‑Fi APs stay connected, and users don’t flood support with tickets. A good check is to compare key services before and after the cutover, not just run pings.
Most outages are caused by small things that are easy to miss:
- native VLAN on a trunk was mixed up, and some devices ended up in the wrong segment
- PoE budget wasn’t considered, so APs or phones started rebooting
- VLANs were moved but ACLs/policies were forgotten, making services inaccessible
- QoS wasn’t checked, so voice/video ended up in the general queue
- there was no rollback plan, so recovery dragged on
Example: when replacing an access switch in an office, if PoE is enabled but priorities aren’t set, during peak draw IP phones in meeting rooms may be the first to lose power. Therefore, mark critical ports and their power settings in advance and verify them immediately after the cutover.
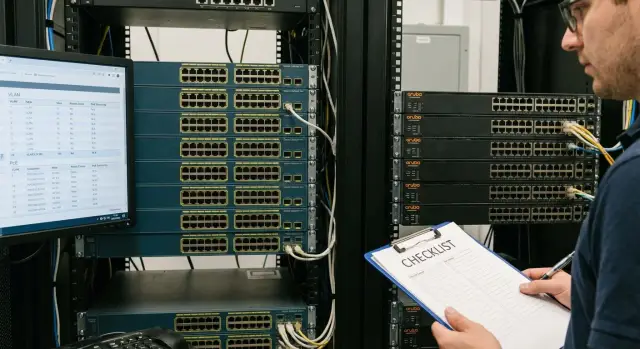
Inventory before migration: what to collect in one day
Before starting work, spend a working day collecting facts. This lowers the chance of surprises during the night cutover: "why didn’t the uplink come up", "where did voice go", "why is there not enough power for APs".
Start simple: record what’s installed and how it currently operates. At this stage accuracy is more important than polished documentation.
Minimum set to collect
- Hardware and software: switch models, firmware versions, modules, licenses, transceiver types and their locations.
- Port map: which ports are uplinks, where trunks are, which are access, which LAG/Port‑Channel are built and which interfaces belong to them.
- VLAN table: IDs and names, where they are used (offices, floors, services), and which native VLAN is set on each trunk.
- PoE summary: which devices are powered (phones, APs, cameras), their estimated consumption, and which points are critical (reception, POS, security).
- QoS and dependencies: what is prioritized (voice, video, VDI/terminals, medical systems) and external services: DHCP, DNS, AAA/RADIUS, NTP, telephony, Wi‑Fi controller, CCTV.
To fit this into a day, split collection into "export from configs" and "visual check". Exports usually give 80% of the picture, and manual checks save you from small but painful things: a forgotten trunk in a meeting room or a camera that’s powered at the limit.
Example: an uplink has a Port‑Channel enabled, but documentation lists it as a simple trunk. If unnoticed, part of the VLANs may not pass after the switch swap and voice or Wi‑Fi will be the first to fail.
The day’s outcome should be clear: one file with the device list, one VLAN table, one port diagram and a separate note with PoE and QoS priorities. That’s enough to proceed with migrating settings consciously rather than from memory.
Mapping Cisco concepts to Aruba CX without extra theory
During migration it’s easier to think in intents: what the port does, where the uplink leads, which VLANs must pass, which services are critical. Then the difference between Cisco Catalyst and Aruba CX becomes a "translation of terms" rather than learning a whole new world.
Network roles usually remain: access (user and phone connections), distribution (floor/zone aggregation), core (backbone), edge (provider links, firewalls). On Aruba CX you build the same layers, but you’ll often rely more on explicit port profiles and templates.
Useful equivalences:
- Port‑Channel (Cisco) = LAG (Aruba CX). Same logic: bundle ports, watch LACP and consistent settings on all members.
- Trunk (Cisco) = tagged VLAN on an Aruba CX port. Access VLAN = untagged VLAN.
- Native VLAN (Cisco) = untagged VLAN on a trunk port in Aruba CX. This is where silent errors most often appear.
- CDP (Cisco) is often replaced by LLDP. If phones or APs were relying on CDP, check that LLDP is enabled and the required TLVs are sent.
- STP/RSTP/MST exist on both platforms. The important part is not the name but matching the mode and root bridge priorities.
For VLANs and trunks the main nuance is that Aruba CX explicitly separates tagged and untagged traffic. When migrating, list separately which VLANs should be tagged on uplinks and which VLAN (if any) must be untagged, and check for any legacy "service" VLANs that Cisco allowed by habit.
For ACLs and policies, look at the application point: on the access port, on the SVI (VLAN interface) or on the uplink. Check:
- exactly where the filter was applied (inbound/outbound) and on which interface
- rule order (first match wins)
- exceptions for DHCP, DNS and telephony
- logging (if it existed) so it doesn’t overload the device
If migration happens in a regulated environment (government, finance, healthcare), agree these "translations" ahead of time so differences in behavior aren’t discovered after the cutover.
Step‑by‑step migration plan: prep, cutover, rollback
A common cause of failure is trying to configure everything "on the fly" during the night. It’s safer to prepare the target Aruba CX configuration in advance, test it on a lab switch (or at least in a separate window), and only then touch production.
Preparation
Create a draft Aruba CX configuration from the inventory: required VLANs, uplinks, LAGs, which ports power phones and APs, and where QoS is needed. Mark ahead which policies and terms change so you’re not hunting for equivalents during an incident.
Then configure the management base: separate management access (or mgmt VLAN), accounts and roles, NTP, syslog, SNMP. Add practical items: a banner, config backup and clear interface names. This saves time when you need to quickly diagnose symptoms after cutover.
Practical order of work:
- Load the base management and access configuration.
- Bring up L2: VLANs, trunks, native VLAN, LAG and verify connectivity between switches.
- Switch uplinks one at a time, recording which cable was moved where.
- Enable PoE in stages: critical devices first (phones, APs, cameras), then the rest.
- Migrate QoS and test voice and video not only with a quick call but under real load.
Cutover and rollback
Work windows are usually scheduled during off hours. Still, it’s useful to repeat quality checks (especially telephony) during peak hours because queues and buffers behave differently then.
Have a rollback plan ready before starting and make sure it can be executed in 5–10 minutes. Minimal checklist:
- Saved configs of old and new devices (with date and version).
- A list of ports and cables: what is connected where and what has already been switched.
- Stop thresholds: which symptoms are critical (no inter‑VLAN connectivity, missing phones, insufficient PoE budget).
- Quick return steps: restore the uplink to Cisco, disable a problematic LAG or temporarily remove a QoS policy.
Moving VLANs: trunks, native VLAN and common pitfalls
Most issues are not "VLAN numbers" but how VLANs pass over a trunk: which VLANs are allowed, which VLAN is treated as native (untagged), and where tagged and untagged traffic were mixed by accident. Start with a mapping table: VLAN ID, name, where it’s used (access ports, trunks, SVIs) and which services it contains (DHCP, telephony, Wi‑Fi, printers).
Trunks and native VLAN: where mistakes happen
On Cisco you’re used to trunk + allowed VLANs + native VLAN. Aruba CX has the same logic but different terms: a VLAN on a trunk may be tagged, and one VLAN can be untagged (the native analog). Main rule: the untagged VLAN must match on both ends of the link, otherwise some devices will "disappear" without an obvious error.
Check each trunk separately. Allowing all VLANs during the switch may seem convenient, but it’s a common cause of broadcast leakage and strange loops. Better to know in advance which VLANs are actually needed on each link.
Management VLAN and L3 settings
If you have a VLAN dedicated to switch management, mark it separately and restrict its exposure: don’t carry it to every edge port and don’t make it untagged by default. That reduces the chance of management being reachable from the wrong segment.
If VLAN routing is done on an L3 device, don’t forget DHCP relay (helper). After moving an SVI to Aruba CX, clients may see the link but not receive an IP.
Short post‑cutover checks for each key VLAN:
- Client gets expected IP, gateway and DNS.
- VLAN gateway and an internal service (e.g., domain controller or CRM) can be pinged.
- A typical user scenario works (IP phone call, printing, Wi‑Fi login).
- On trunks, compare allowed VLAN lists and confirm matching untagged/native VLANs.
If migration is phased, it’s convenient to start with one floor or department: move the user VLAN and printers, and leave servers and management unchanged until the next window.
PoE during migration: power budget and priorities
PoE usually becomes a problem after the cutover: the network is up but some APs or phones didn’t power on. To avoid blaming cables or firmware, start with power: how much is actually needed and who must be prioritized.
First, calculate the budget. Sum the consumption of all PoE devices and check each switch: it has a total PoE budget and per‑port limits. In practice keep a table: port, device type, expected watts, criticality.
Then break consumption down by role. IP phones usually draw little and should always power up. APs can draw considerably more (especially Wi‑Fi 6/6E and USB‑powered models). Cameras often draw medium power; panels and terminals can spike at boot. If some devices require PoE+ or higher, ensure the port and switch support it.
Set PoE priorities for critical ports. Simple logic: keep connectivity first, then everything else. If the budget will be exceeded, it’s better to lose power on non‑critical devices than to bring down telephony or key Wi‑Fi.
Quick checklist before cutover:
- Compare Aruba CX total PoE budget and actual port load.
- Check port modes: auto, enable, disable, and per‑port power limits.
- Assign PoE priorities for phones, backbone APs and critical cameras.
- Identify which devices need PoE+ and which can work in standard PoE.
- Verify UPS margin if switches and power depend on it.
Turn on devices in stages. For example: boot the switch and only phones first, then Wi‑Fi, then cameras and the rest. This avoids simultaneous startup spikes that can trip power even if the budget is technically sufficient.
Example: 24 phones, 6 APs and 8 cameras on one switch. If everything starts at once, APs may request maximum power and consume the reserve. With staged power‑up and correctly set priorities, critical services come up first and remaining ports can be brought to normal with power limits.
If migration is large‑scale, plan for spare budget and agree which ports can be restricted so you don’t risk connectivity.
Migrating QoS: marking, queues and quality checks
QoS is migrated not for the sake of policies but to ensure predictable quality for services: voice, video, VDI, cameras, clinic terminals, critical apps. Before copying settings, agree with service owners which traffic classes should win and which can wait.
Most problems aren’t with prioritization itself but with expectations: where marking happens, who you trust to tag traffic, and which queues actually get congested. First document the current model: which DSCP and CoS are used and where they appear on ports.
What to collect and how to map
A short QoS inventory helps migrate settings deliberately:
- Which traffic classes are critical (SIP/RTP, Teams/Zoom, VDI, medical devices).
- Where marking is applied: phone, AP, PC, on the access port or uplink.
- Which values are used: DSCP (e.g., EF/AF) and CoS on trunks, and where rewriting happens.
- Which interfaces were bottlenecks: uplink, inter‑switch links, core exit.
- Whether rate limits or shaping existed on uplinks and for which classes.
Then map this to Aruba CX logic: the goal is not to replicate commands but to achieve the same queue behavior (priority queue for voice, predictable latency for interactive traffic, and no starvation for other classes).
Also check the trust boundary. A common mistake is trusting marks from a workstation and then being surprised that someone marked downloads as "voice." It’s usually safer to trust phones and APs, and tag other traffic at the port according to rules.
Quality checks after migration
Prepare tests in advance and repeat them before and after cutover:
- One voice call: natural speech, no robotic artifacts.
- Voice call under heavy load (file copy): voice should not degrade.
- Video conference during peak hours.
- VDI or critical app responsiveness test.
- Compare queue counters and drops on uplinks to see where problems begin.
If telephony/video exist in the network, record expected metrics (delay, loss, jitter) and accept migration based on those, not on "similar configuration."
Services checklist: quick checks before and after
After migration the network often looks "alive": links are up, ports show in the controller, pings sometimes succeed. But users judge by different criteria: does email open, does the IP phone register, does the printer print. So verify services, not just switches.
Before replacing hardware, record the current state and prepare a rollback. This saves hours if a small dependency surfaces.
- Save Cisco configs and capture outputs of key commands: VLANs, trunks, PoE, QoS, MAC tables, STP, LACP.
- Mark critical ports and what’s plugged in (uplinks, APs, phones, cameras, servers).
- Prepare a rollback plan: what to restore and in what order, who’s responsible, and how much time you have.
- Verify admin access: credentials, SSH/console access, separate management VLAN access.
- Record baselines: gateways, DNS, main apps and control pings from several points.
Right after cutover start with basic connectivity and then move to user scenarios. If there’s a loop or storm at the start, other checks will only be distracting.
- Check reachability of gateways and core subnets, ensure there are no broadcast storms or abnormal link loads.
- Make sure DHCP assigns addresses, DNS responds, NTP time is correct, and domain authentication (AD/LDAP) works.
- Quickly run user scenarios: internet, corporate apps, file access and printing.
- Separately test communications: IP telephony, Wi‑Fi roaming, video conferencing and CCTV.
- Verify monitoring and backups: are metrics/traps coming in, and are device backups still running?
Example: everything pings after replacing access, but phones don’t register. This often points to VLAN/trunk issues (wrong native VLAN) or PoE priorities and power budget overload. Keep 2–3 control devices (phone, laptop, camera) and test them with the same scenario in each cabinet.
Common mistakes and how to avoid them
The most painful failures aren’t caused by complex settings but by small mismatches that appear only after the cutover.
One typical issue: VLANs were migrated but trunks were left as "allowed all." As a result, extra traffic leaks between segments, unexpected DHCP responses appear or broadcast surges occur. Rule: set the allowed VLAN list on each trunk and keep it minimal.
Native VLAN is another frequent source of trouble. If one end treats untagged traffic as one VLAN and the other end as another, you get "ghost" problems: devices appear and disappear sporadically and the cause is not obvious. Before cutover, verify which VLAN should be untagged on each link and configure both sides identically.
STP is easy to underestimate. If root priorities and roles aren’t set, the network may converge slowly or, worse, form a loop after an accidental patch. Decide the root location and ensure loop protection is enabled on user ports.
PoE commonly trips under load. Everything works in lab, but under real traffic some APs or cameras start rebooting when total consumption exceeds a switch’s available PoE.
QoS issues usually stem from trust boundaries. Policies are enabled but DSCP is not trusted on ingress, or voice traffic doesn’t hit the correct queue. The result is user complaints about call quality after migration.
How to reduce risk
- Set allowed VLAN lists on every trunk and verify they match the design.
- Explicitly set native/untagged VLAN and test untagged traffic with a host.
- Define STP root and set priorities before switching.
- Compute PoE budget with margin and assign power priorities to critical ports.
- Test QoS with real traffic: calls, video streams, file transfers.
A separate risk is the lack of a rollback plan. Keep saved configs "before/after", a list of ports for quick restoration and a clear rollback criterion. This reduces downtime even when unexpected problems appear.
Example scenario: migrating an office without stopping work
An office with 150 employees: IP phones at desks, staff and guest Wi‑Fi, corridor cameras, a few printers and a couple of small servers. About 10–15 VLANs: users, telephony, CCTV, Wi‑Fi staff, Wi‑Fi guest, management and several service segments.
Preparation can be done in one working day if you don’t try to make everything perfect. Create a simple table: port, connected device, VLAN, needs PoE, special settings (voice VLAN or phone priority). Choose a work window (usually late evening) and notify people in advance about potential short interruptions and what to do if something doesn’t work in the morning.
Migrate in parts to avoid downing an entire floor. On the first night change only a couple of access switches in one wing or on one floor. Bring Aruba CX switches up with the same VLANs, trunks and PoE, but keep the distribution uplink on Cisco for now. Then move the uplink for that area to Aruba and observe phones, APs and cameras. If something goes wrong, rollback is simple: restore the uplink.
After the cutover check not only "internet works" but specific workflows:
- Make an internal and external IP phone call and ensure voice quality is good.
- Run a 5–10 minute video meeting without freezes.
- Wi‑Fi stress test: several devices downloading files and roaming across the office.
- View camera streams and recording.
- Access key services (mail, 1–2 corporate apps, printing).
When the area is stable, repeat the template for the next set: one or two more access switches, then the next uplink. At the end update diagrams and port tables and save the working config as a reference for other zones. Having a short work template speeds up subsequent nights.
Next steps: pilot, work plan and who to trust with implementation
To keep migration calm, agree in advance what counts as success. "Everything works" is too vague and causes disputes after cutover.
Define acceptance criteria and measurable checks. It’s useful to align these with service owners (office network, telephony, Wi‑Fi, CCTV, server VLANs) and turn them into a short list:
- clients get addresses (DHCP), reach the internet and required subnets
- phones register and keep registration under load
- APs receive PoE, appear in the controller and serve networks
- critical apps meet required quality (latency, loss)
- monitoring sees devices and ports, logs are collected
Run a pilot on one segment instead of switching everything at once. Choose an area that includes typical port roles (user ports, APs, phones, uplinks) but where an outage won’t stop the company. After the pilot adjust templates and then scale.
Before the maintenance window prepare a single kit: port table (what is connected where), config templates, rollback plan and control points (what to check at 15 minutes, 1 hour, 4 hours). The first 24–48 hours after migration require on‑call support and monitoring: issues often surface not immediately but during peak usage.
If you need a turnkey migration, pick a team experienced in cross‑vendor VLAN, PoE and QoS migrations. For example, GSE.kz (gse.kz) as a systems integrator can help with planning, implementation and post‑cutover support, including 24/7 coverage during and after the window.