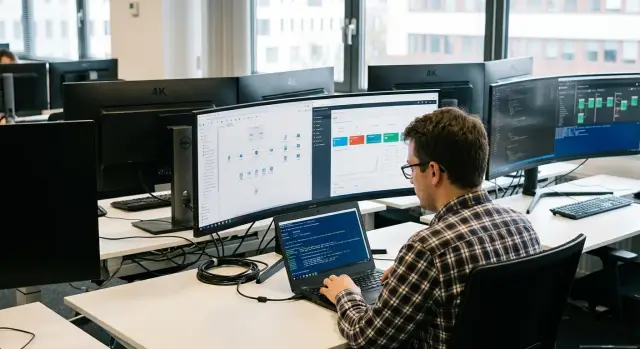
Mass monitor configuration via EDID: PowerShell for the office
Mass monitor configuration via EDID in the office: how to collect inventory, apply resolutions and scaling, and solve common 4K and ultrawide issues.
What’s the office problem and why does it repeat
Mass configuring monitors almost always starts the same way: a few workstations look fine, while others have someone who manually changed resolution, scaling or display order. When there are 20 seats this is tolerable. At 100–200 seats any Windows update, monitor swap or cable shuffle turns into a wave of small incidents.
Usually the basic things “go wrong.” Resolution is reset to an unsuitable value (for example, instead of native 3840×2160 a lower mode is selected). Scaling becomes too small or too large. Display order changes and the cursor “jumps” to an unexpected place. Rotation is lost after replacing a portrait monitor with a landscape one. Sometimes Windows assigns the wrong primary display so taskbars, windows and notifications end up on a side screen.
The situation is aggravated by “almost identical” models. In procurement this is common: same brand, similar look and diagonal, but different batches, revisions or firmwares. For the user it’s “the same monitor,” but for the system it’s a different device with different identification data. The old settings profile then doesn’t match and Windows falls back to defaults.
Support symptoms repeat month after month: tiny text on 4K, blurry images after scaling, apps opening “in the wrong place,” windows off-screen, and everything changing after connecting to a dock. That’s why mass monitor configuration via EDID is seen as a way to make behavior predictable even when hardware and cables in a real office keep changing.
EDID without the theory: what Windows reads from the monitor
EDID is a short “profile” the monitor provides to the computer over the cable. From it Windows decides which resolutions and refresh rates are allowed, which mode is considered native, and how to name the device in the display list. If EDID is correct, auto-setup works with almost no user involvement.
In office automation several EDID fields are important. First — manufacturer and model (usually what you see in Device Manager). Second — serial number or instance identifier: it helps distinguish two identical monitors at one workstation. Third — the list of supported modes (resolutions, refresh rates), including the “preferred” mode. That often determines whether the user gets 1920×1080, 2560×1440 or 3840×2160 by default.
The problem is EDID doesn’t always reach Windows unchanged. Docks, KVMs, cheap HDMI-to-DisplayPort adapters and even some “smart” cables can present a truncated EDID or substitute a generic profile. Then Windows sees not the real monitor but a generic “Generic Display,” and available modes are incorrect. This causes typical symptoms: a 4K monitor suddenly working as 1080p, an ultrawide limited to 16:9, or display order changing after reconnecting.
There is a subtler trap: the model on the label is not necessarily what Windows sees. The sticker describes a commercial lineup, while EDID may contain a different model code, panel revision or firmware variant. So for mass configuration it’s better to rely on what the OS reads (PnP ID and EDID fields) rather than on procurement descriptions. That way profiles will be tied to the hardware actually connected.
What scripts can realistically configure in Windows
Scripts don’t try to “guess” the perfect image for every workstation; they bring settings to a clear standard. That’s the point: Windows reads model and supported modes, and you apply pre-agreed rules.
It’s easiest to automate what can be checked and repeated on any PC. Usually that’s inventory, validation and applying “templates” per display type.
In practice PowerShell is most often used to:
- gather a list of connected displays (model from EDID, serial, input, current resolution);
- verify that the chosen mode is supported (refresh rate, color depth, aspect ratio);
- set basic display parameters via system APIs or approved utilities;
- lock the primary monitor and base orientation (portrait/landscape) where it’s critical;
- log results and roll back to a safe profile if a mode failed to apply.
Harder are things that depend on the individual user. Scaling (125%, 150%) is often stored in the user profile and behaves differently in RDP/VDI and when swapping monitors. Exact multi-display layout (coordinates, left-right order, different DPI) can also “shift” when a cable is reconnected or a dock is replaced.
There are hardware limits too: GPU driver, Windows version, connection type (HDMI, DisplayPort, via dock) and even the cable affect available modes. The same 4K monitor may offer 60 Hz over DP and only 30 Hz over an older HDMI, and no script will change that.
A realistic goal is usually “good enough for most.” For example, for 4K set 3840×2160 and recommended scaling, and if the monitor can’t sustain that mode or refresh rate — fall back to 2560×1440 with readable text rather than trying to handle every rare combination.
Preparation: monitor inventory and target profiles
Before you start mass configuring monitors via EDID, accept a simple fact: “identical” monitors in an office often turn out to be different. Revision, firmware, connection type (DP, HDMI, USB-C), dock and even cable vary. Any of these details changes what Windows sees via EDID, so the same scenario can produce different results at different seats.
Start with an inventory per workstation. It’s important not only to record the model but to collect identifiers you can confidently match to the correct profile later. It’s convenient to store this in CSV and update it when equipment is replaced.
Minimum data to record for each display and connection: EDID identifiers (vendor, model, serial number, supported modes), port type and connection chain (PC -> dock -> monitor, adapters), the actual “native” resolution and refresh rate that Windows selects by default. It’s useful to add “live” support signals: user complaints (tiny text, “blurry” image, disappears after sleep) and GPU/driver data, because some problems originate there.
At the same time agree on target profiles. Usually 3–4 variants are enough: 1920×1080 for standard desks, 2560×1440 for larger panels, 3840×2160 for 4K and 3440×1440 for ultrawide. For each profile decide not only resolution but expected scaling.
It’s important to separate levels. Resolution and orientation are tied to a specific display and its identifiers. Scaling in Windows is more often a user preference: one person likes 150%, another 125%, and you should account for that when configuring a shared image or applying policies.
If you need repeatability, the cheapest way to reduce chaos is to standardize monitor and dock models at least within teams. Then profiles work more predictably and support spends less time figuring out “why it’s different from the neighbor.”
Step-by-step: a PowerShell flow for mass configuration
The EDID approach is convenient because you rely on the actual monitor instance rather than “PC #27.” Build logic as a pipeline: collect facts, match to a profile, then change settings.
1) Collect inventory (CIM + registry)
Windows usually exposes connected monitor data via the registry (Enum branch) and CIM. Practically this means you pull vendor/model identifier and serial from EDID, then merge in current display configuration.
# EDID в реестре (упрощенно: перебор ключей DISPLAY)
$base = 'HKLM:\\SYSTEM\\CurrentControlSet\\Enum\\DISPLAY'
Get-ChildItem $base -ErrorAction SilentlyContinue | ForEach-Object {
  Get-ChildItem $_.PsPath -ErrorAction SilentlyContinue | ForEach-Object {
    $p = Join-Path $_.PsPath 'Device Parameters'
    $edid = (Get-ItemProperty -Path $p -Name EDID -ErrorAction SilentlyContinue).EDID
    if ($edid) {
      [pscustomobject]@{ RegistryPath=$p; EdidBytes=$edid }
    }
  }
}
Then decode the EDID bytes into readable fields (model, serial, supported modes). Wrapping this in a function and returning objects makes it convenient.
2) Match to the profile
Store profiles in a simple format (JSON/CSV): e.g. “model X - 3840×2160, scaling 150%, orientation landscape,” and for identical models but different seats add serial-based bindings. If serials are missing or identical, use indirect signs: supported modes list (e.g. presence of 3440×1440 as a marker of ultrawide).
3) Safe apply: check -> change -> log
Do a dry-run first: the script writes what it plans to change and notes mismatches (monitor not found, EDID empty, mode unsupported). On real apply save the current state to a file (for example under ProgramData) and keep a log: time, user, chosen profile, result.
4) Mass rollout
Separate machine-level and user-level settings. Base display schemes often apply at startup (via policies or a system script). User-bound parameters (including scaling) are better applied at logon via Task Scheduler. For mobile scenarios run on connect events: a new monitor or dock change.
5) Rollback
Rollback should be as automated as apply. Save the “before” state and restore it on error, and include a clear script version marker. If something goes wrong support needs one quick action: “restore previous profile” without manually reversing dozens of settings.
Resolution and scaling: 4K without pain for users
4K in the office almost always triggers the same complaint: “everything is too small.” That’s expected. At 3840×2160 UI elements become physically smaller if scaling stays at 100%. The solution is usually proper Windows DPI scaling, not lowering resolution.
Separate two concepts. Panel resolution determines sharpness. Scaling (125–200%) controls size of text, buttons and windows. Using 1920×1080 on a 4K panel makes elements larger but often introduces blurriness and poorer text rendering.
Common breakage points are mixed scaling across displays (move a window and its size changes), remote sessions (RDP/VDI) and profile changes (monitor swap, first logon, moving to another seat).
For EDID-driven mass configuration it’s better to define profiles by groups rather than one-size-fits-all. Accounting, contact centers and designers have different needs: readability, uniform large elements, or maximum space and accuracy.
Check results not only by numbers but by readability in mail and 1–2 key apps, blurriness (especially in legacy apps without DPI support), consistent UI size when moving windows between monitors, and remote session behavior if used.
If an old app “floats,” adjust DPI compatibility for that app instead of changing scaling for everyone.
Ultrawide monitors: frequent failures and workarounds
Ultrawide monitors (21:9, e.g. 3440×1440) provide more space but create more typical failures: black bars, stretched windows and fonts, or the system offering a strange mode like 2560×1440 instead of native.
One common reason 3440×1440 is missing is simple: the connection chain (laptop -> dock -> cable -> monitor) lacks bandwidth. Adapters (especially HDMI over USB-C) and older docks often limit the maximum even if monitor and laptop support more. Windows may read EDID but fail to apply the mode and revert to a safe option.
Separate three classes of problems:
- port or dock limitation: the same laptop shows the mode via a different output;
- GPU limitation: the mode is unavailable on that laptop model but works on a more powerful machine;
- wrong EDID (or its reading): the monitor is detected as “Generic,” frequencies disappear and modes change after sleep.
Office practice: choose a conservative standard for ultrawide that will work through docks and cables. For example, 3440×1440@60 Hz without attempting to squeeze 100–144 Hz on regular desks. This reduces complaints about flicker and spontaneous refresh changes.
Sometimes it’s cheaper to move to two regular monitors instead of one ultrawide. This is especially true when many laptops use different docking stations: two 1920×1080 or two 2560×1440 typically behave more predictably than one picky 21:9 through adapters. A practical rule: if ultrawide only works on direct cable but consistently fails via dock, reconsider the standard rather than endlessly fixing individual seats.
Multi-monitor layouts: making them consistent everywhere
In the office it’s important not only to have the “right picture” but also the same layout. If one person has the primary monitor on the left and another on the right, windows, notifications and the cursor constantly “end up” in the wrong place. For that reason mass configuration via EDID usually fixes basics: which display is primary, left-right order, top alignment (or bottom) and rotation (portrait for documents).
Why does the layout break? Mostly due to laptops and docks. After sleep, cable disconnect, dock reconnect or port change Windows can renumber displays differently. Sometimes EDID is read through a dock or adapter and the system treats it as a different device. The familiar monitor suddenly becomes secondary and the primary moves.
To keep layouts consistent, agree on typical schemes by department and lock them as standards. Usually 2–3 profiles suffice: laptop + 1 external (external primary), laptop + 2 externals (two externals with one primary), and a scheme for desktops with three displays (central primary). Separate rotation: where a vertical monitor is needed for documents.
Validation must be quick. Before applying a profile check where the taskbar appears, which screen opens the Start menu, where notifications arrive, and whether the cursor falls into a non-visible area (this happens with mismatched heights and wrong alignment).
Store profiles as clear templates (e.g. "Sales-2Mon", "BackOffice-1Mon") and apply them by script on relevant events. Then the standard survives monitor, dock and seat changes.
Common mistakes and automation traps
The main mistake in mass EDID-based configuration is blindly applying the same profile everywhere. A monitor may look identical but expose different modes: another refresh rate, a different list of resolutions, or different HDR flags. If a script force-sets 3840×2160@60 but the device is only available at @30 (or current cable exposes a truncated EDID), you’ll get a black screen or unstable image.
Cables and adapters are often to blame. Offices mix HDMI, DP, USB-C adapters and cheap converters. Because of that EDID can be read incorrectly or partially and Windows will select a safe mode. On some seats everything works, on others the display suddenly shows 1024×768 or loses the desired refresh rate.
Another trap is expecting one PowerShell script to behave identically on all GPUs and Windows versions. In practice much depends on driver (Intel, NVIDIA, AMD), security policies, presence of RDP, and how a monitor is connected to the dock.
Don’t forget the user level. Scaling and some display parameters may be stored in the user profile while you run the script as administrator or in system context. As a result resolution may apply but scaling remains unchanged and a 4K user still complains about tiny text.
Minimum checks for automation before rollout: verify available modes and refresh rates before applying; validate the connection chain (port, cable, adapter); separate machine and user-level settings; test on 2–3 typical setups (different GPUs, Windows builds, docks); and include a clear rollback.
And without logs you won’t know why a profile failed on 10 of 100 seats. Log at least monitor model from EDID, current and target mode, user, application result and driver error text. Then support can quickly distinguish “broken adapter” from “profile mismatch.”
Short checklist before mass apply
Before running mass configuration check basic things. Most failures are not caused by scripts but by different monitors, cables, adapters and docks across seats.
First confirm what’s physically connected. Collect EDID and a clear model name for every monitor, plus a list of exceptions (old panels, TVs in meeting rooms, nonstandard touch displays). Exclude these exceptions from automation and configure them manually.
Next check the “physics”: cables, docks, adapters and GPU ports. For 4K and ultrawide the chain often can’t sustain the required refresh. On paper the monitor supports 3840×2160, but in practice via an old HDMI or cheap adapter the system sees only 30 Hz or reduced resolution.
Then define target profiles for user groups. Usually 2–3 options suffice: 24" Full HD, 27" 2K, 27–32" 4K. For each profile lock both resolution and recommended Windows scaling for readable text.
Quick pre-launch checklist:
- EDID and model for each monitor collected, exceptions listed.
- Cables and docks verified for required resolution and refresh.
- Resolution and scaling profiles approved per user groups.
- A test group of 5–10 seats with different scenarios prepared.
- Logs and a clear rollback ready.
Choose a test group that includes 4K, ultrawide and at least one docked setup. If after applying a user is worse off (second screen gone or everything too large), rollback should take minutes: restore previous settings, re-login and record the issue in logs.
Realistic example: what this looks like in a typical office
A 60-seat office. Accounting and analysts have 27" 4K, designers and dispatchers use 34" ultrawide, others have 24" 1080p. Half work on laptops through docks, and after desk moves on Monday complaints start: “everything is huge,” “nothing is readable,” “second monitor disappeared.”
The admin decides to stop fixing each case manually and maps seats to simple profiles applied by script using EDID (monitor model, serial, supported modes). This produces rules that are easy to explain to managers and first-line support:
- Profile A (27" 4K): 3840×2160, scaling 150%, fixed monitor order.
- Profile B (24" 1080p): 1920×1080, scaling 100%.
- Profile C (34" ultrawide): 3440×1440, scaling 100% or 125% depending on role, duplication off by default.
The PowerShell script at logon checks connected displays via EDID and picks the profile. If it detects 4K but Windows applied 100% (often after RDP or dock change), it restores 150%. If an ultrawide is running at 2560×1080, the script attempts to set native resolution and saves the display layout.
Exceptions are handled up front. For example, two dock models produce incorrect display order after sleep, and meeting rooms always need duplication to a projector. These are listed as exceptions by dock Hardware ID or specific monitor EDID and given separate rules.
Next steps are short: pilot on 10 seats, document profiles, train first-line support (what to check and how to rollback), then roll out to the whole office.
Next steps: lock the standard and simplify support
To prevent mass configuration from becoming a one-off job, turn it into a clear standard. The simplest path is to reduce variants to a few profiles and adopt them as corporate templates. Support then won’t guess which scaling or layout was “correct” at each seat.
Two to four profiles cover most office scenarios: 24" Full HD, 27" QHD, 27–32" 4K and an ultrawide option for specific roles. Fix key parameters for each profile (primary monitor, display order, recommended resolution and an acceptable scaling range).
Standardize hardware around displays where possible. Many 4K and ultrawide issues stem not from Windows but from a mix of cables, adapters, docks and differing PC ports. It helps when the company has 1–2 standard PC models, 1–2 dock models, a preferred connection type (for example DisplayPort) and a curated list of supported monitor models for procurement.
Integrate EDID and layout checks into equipment issuance and replacement processes. The idea is simple: when a new monitor is connected, the script compares EDID with the expected profile and either applies settings or flags a deviation for manual review. This saves hours when staff move desks or docks are replaced.
Review profiles quarterly (and after major Windows or driver updates): scaling behavior and multi-monitor handling sometimes change.
If you also want to reduce device variety and lock procurement standards, it’s often easier to do that with a systems integrator. For example, GSE.kz (gse.kz) in Kazakhstan supplies and integrates PCs, workstations and servers and provides 24/7 technical support through a network of service units.
FAQ
Why do monitor settings keep resetting even though “nothing was changed”?
If monitors are frequently reconnected, cables or docking stations are swapped, or Windows is updated, the system can re-detect displays and apply default values. Even similar-looking models can have different EDID identifiers, so the previous profile may not match the newly detected device.
What is EDID and why is it needed for mass configuration?
EDID is the data a monitor provides to the computer over the cable so Windows knows which modes are available and which is the “native” mode. In practice, EDID lets you bind profiles to the actual connected display that the OS sees via PnP/EDID.
Why is a 4K monitor sometimes detected as 1080p or “Generic Display”?
Most often the cause is the connection chain: a dock, KVM, adapter or cable is supplying a truncated or substituted EDID. Windows then sees a “Generic Display” and offers a limited set of modes, so a 4K panel can end up as 1080p or lower.
Can one profile cover all “identical” monitors bought in a procurement?
Usually yes, because the profile is tied to what Windows reads from EDID. But if different batches have different revisions/firmwares and show different model codes or serials in EDID, they may require separate rules or more flexible matching.
What can scripts reliably change in Windows and what will still “float”?
Resolution and orientation can usually be set predictably if the mode is actually supported by the current connection. Scaling is harder: it often lives in the user profile and behaves differently after RDP/VDI or when switching monitors, so apply it separately and verify.
For 4K is it better to lower resolution or change scaling?
The recommended default is to keep the native 3840×2160 and increase scaling so text is readable. Lowering to 1920×1080 makes elements larger but often introduces blurriness and poorer font rendering, which leads to new complaints.
Why doesn't 3440×1440 appear on ultrawide monitors or why does everything reset after sleep?
Most often it’s a bandwidth issue: the dock, port, adapter or cable cannot support the required mode at the needed frequency. A script can choose the right profile, but if the hardware physically cannot do 3440×1440@60, Windows will fall back to a safer mode.
How to make the same monitor order and “main monitor” on all workstations?
Create a few standard layouts (for example, one external as primary or two externals with a fixed primary) and apply them on connect/login. Rely on EDID rather than display numbers, because numbering often changes after docks or sleep.
Where to start deployment to avoid a mass “black screen”?
Start with an inventory: collect EDID, current modes, port types and connection chains, then define 3–4 target profiles. Run a pilot, use dry-run mode, enable logging and have a rollback that restores the saved state so support can recover work in minutes.
What must be logged when mass-configuring displays?
At minimum — monitor model/ID from EDID, current and target mode, refresh rate, who ran the script and the application result with any driver/API error. Without that it’s hard to tell a bad adapter from a mismatched profile and to diagnose why 10 out of 100 seats behave differently.