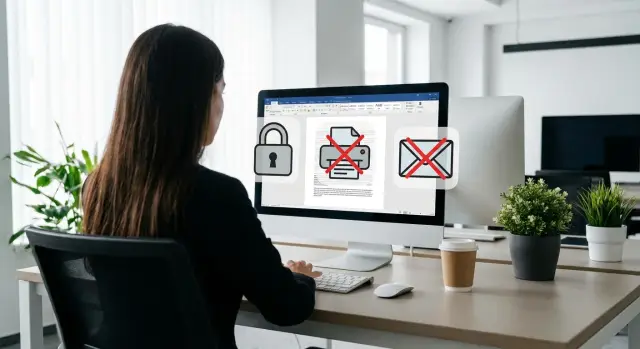
IRM/RMS document protection: Purview without unnecessary restrictions
IRM/RMS document protection: how to use Microsoft Purview Information Protection to restrict printing and forwarding without breaking everyday processes and collaboration.
The task in simple terms: what it means to limit a document
When people talk about IRM/RMS document protection, they usually don’t mean “hide the file,” but rather set rules for how the file should behave. The document can be opened only by allowed people and only in allowed ways, even if it’s forwarded or copied to a USB drive.
Protection covers not only Word and Excel. Emails and attachments, presentations, PDF reports and even contract templates that circulate between departments and contractors are often restricted.
Risks usually look ordinary: an employee forwarded an email to the wrong person, someone printed “for convenience” and left it at the printer, text was copied into a messenger, or a file was placed in a shared folder without proper permissions. Screenshots are harder: it’s almost impossible to completely “ban screen photos.” So restrictions are best combined with other measures, such as watermarks and incident logging.
Passwords usually don’t help for a simple reason: a password is easy to share, and once the file is opened it lives its own life. It can be forwarded, printed, copied in parts, and you can’t control what happens next.
In practice, limiting a document boils down to a few clear rules:
- who can open it (specific people or groups);
- whether forwarding and printing are allowed;
- whether text can be copied or exported;
- whether editing is allowed or the file is read-only;
- how long access lasts (for example, until a tender closes).
Such restrictions are especially needed when a document leaves a single team: procurement, finance, HR, legal documents, project specs. For example, when exchanging commercial offers and technical requirements with external contractors in the public sector or education, it’s important that the file can’t be simply forwarded without your control.
How IRM/RMS works in practice
IRM/RMS embeds rights into the file itself and checks them each time the file is opened. So the protection travels with the document, not staying on one computer or in one folder.
The difference from DLP is simple. DLP watches channels (mail, messengers, uploads) and tries to stop data from leaving. IRM/RMS doesn’t so much “catch leaks” as limit what a person can do with the file, even if they already have a copy.
Permissions are usually tied to a user or group (for example, “Finance”, “Legal”), not to a device. Open the file on a different PC, on a business trip, or in a web viewer—the rules remain the same: the system verifies identity and roles and then applies restrictions.
Typical basic restrictions include: read-only access, no printing, no copying text (screenshots are partially dependent on the app), no forwarding or saving without protection, and an expiration for access.
When sending externally the logic is: if the recipient isn’t on the allowed list, the file either won’t open or will open in a restricted mode you configured. Example: an employee prepares a contract for an external contractor. Internal lawyers can edit it, while the contractor sees only read-only and cannot print. This reduces risk and, with careful settings, doesn’t turn the document into a “brick.”
Microsoft Purview Information Protection: what it consists of
Microsoft Purview Information Protection can be seen as a set of pieces that together solve the problem: label the document, protect it, and then understand what happened to it. Essentially it’s “labels,” a “lock,” and an “audit log.”
Labels and classification
At the core are sensitivity labels. You set clear categories like “Public,” “Internal,” “Confidential” and attach rules to them. A user sees the label in the app and chooses it almost as easily as choosing an email subject.
A label usually does several things at once: adds a visual mark (for example, in a header/footer), applies protection and suggests how to handle the file. Then protection feels less like a set of bans and more like a normal action: choose the right level.
Encryption and permissions: who can open and what they can do
Encryption and rights management determine two things: who can open the document and which actions are allowed. Commonly restricted actions are printing, forwarding (or allowing it only inside the organization), copying text, and editing.
Importantly, the permissions travel with the file. Even if the document was emailed or placed on a USB drive, it doesn’t become “ordinary.”
App policies and logging
To avoid forcing users to decide every time, policies are applied to Outlook, Word, Excel. Some organizations also add rules for PDFs if the chosen workflow supports it.
Admins typically have events for investigations: who applied a label, who tried to open a file, whether access was denied, from where and when. This helps analyze incidents without guessing and shows when a policy is too strict and disrupts work.
Where to start: identify documents and access rules
Before enabling IRM/RMS protection, it’s useful to do a small inventory: which files actually leave the department and where mistakes happen most. Don’t start by banning “everything.” Choose 2–3 clear scenarios where control gives quick benefits and barely disrupts processes.
Make a short list of documents and situations. Usually these are commercial offers, contracts and attachments, executive reports, CRM or accounting exports, spreadsheets with personal data. Consider not only file types but routes: inside the company, to a contractor, to a client, to a regulator.
Then define roles—not by job title, but by actions: author, internal recipient (colleague), external recipient (client or partner), manager, legal. This approach is easier to maintain: people change, roles and rules stay the same.
To avoid turning restrictions into punishment, agree on logic in advance. Ban only what is truly risky (printing, forwarding to others, copying text, altering content). Leave what the document needs to be useful: viewing on mobile, comments, collaborative editing, version history.
Example: a commercial proposal can be allowed for the client as view-only, with no printing or forwarding, while the internal team retains collaborative editing and comments. Lawyers and managers often need full access for approvals rather than simple “read and forget.”
If rollout covers branches and different sites, appoint a rules owner (usually IS together with legal) and a process owner (IT). In system integration projects like those run by GSE.kz, it’s helpful to document these decisions: it saves time when the question “why was printing allowed yesterday but not today?” appears.
Step-by-step: deploy labels and restrictions without pain
To keep protection from becoming endless bans, start small and make rules understandable. The most common mistake is trying to cover every file type and exception at once.
Minimum label set
At the start, 3–5 labels are enough for users to choose without instructions. Names should be user-friendly, not “Confidential v2.” For example: “Public,” “Employees only,” “Department only,” “Confidential,” “Strictly confidential.”
For each label set a simple set of rights: who can read, who can edit, printing allowed, forwarding allowed. If in doubt, don’t enable the strictest restrictions immediately. Banning printing and forwarding is useful, but if applied to everything, people will start bypassing protection with screenshots and paraphrasing in messengers.
Pilot and expansion
A typical plan looks like:
- agree on 3–5 labels and a short description for each (one sentence for when to choose it);
- attach basic restrictions to labels in Microsoft Purview Information Protection (or a chosen alternative) and test on a few representative files;
- add inline hints at label selection explaining what will be blocked and who will have access;
- run a pilot with one team for 2–3 weeks and collect real cases where rules get in the way;
- expand to other departments, adding exceptions only based on concrete cases.
Example: accounting marks invoices as “Department only” (readable only within the group, forwarding prohibited), while contracts with partners are “Confidential” (restricted reading but printing allowed for signing). If you need help with a pilot and settings, a Microsoft-practiced system integrator like GSE.kz typically covers technical setup, policy agreement and user training.
Automatic classification: when it helps and when it harms
Auto-classification in Microsoft Purview Information Protection is useful where rules are simple and repetitive. But it quickly annoys users if labels “stick” to too many files and disrupt normal work.
There are two clear modes. Manual—users pick a label themselves. Automatic—the system assigns a label by rules or suggests one if it finds signs of sensitive data. For IRM/RMS protection it’s usually better to start with recommendations, not forceful auto-assignment.
How to avoid drowning in false positives
Automate where errors are rare and the cost of a mistake is clear. Decide in advance: what’s worse—missing one document or tagging a hundred unnecessarily?
Starter rules often include:
- national IDs and similar identifiers (patterns and checks);
- contract or invoice numbers if you have a consistent format;
- marker words: “trade secret,” “for official use,” “NDA”;
- combinations like “Full name + phone + address” as a sign of personal data;
- classification by storage location (e.g., HR folder).
After enabling, review reports: where labels are applied and why. If 30–40% are incorrect, simplify the rule or add conditions (for example, not just 12 digits, but 12 digits next to the word “IIN”).
Exceptions you shouldn’t skip
Handle exceptions as clear scenarios, not ad-hoc requests: project folders, tender documents, exchanges with state bodies. For example, allow forwarding to specific organization domains or disable print bans for templates that must be filed in paper archives. Exceptions should be rare, documented and auditable, otherwise automation will turn into chaos.
External recipients: how to share while keeping control
Files leave the company not just internally: contractors, auditors, suppliers, regulators. IRM/RMS’s goal here is simple: give partners exactly what they need for work and keep the ability to manage access afterward.
Counterparties and external domains
Start with rules for external addresses: who can receive protected files and which domains are trusted. It’s practical to keep 2–3 modes in Microsoft Purview Information Protection: view-only without forwarding, collaborative editing with rights, and read-only for final versions.
A practical approach:
- contracts and reports: view-only, no printing or forwarding;
- collaborative preparation: edits allowed, but copying and export limited;
- commercial offers: printing allowed but with an expiration.
Temporary access and expiration
Expiration makes sense when a document is needed “for a window,” e.g., for a tender, approval or audit. It reduces the risk that the file resurfaces months later outside context.
If the recipient lacks the required account
This is a common pain point. Decide in advance which scenarios you’ll support: guest access (if company policy allows), one-time codes, or issuing a protected copy in another format for a specific task. The key is not to force people to “break” the process—otherwise they’ll resort to screenshots and paraphrasing.
Before launch, test behavior in real chains, not ideal conditions:
- if the recipient forwards an email, does the restriction persist;
- downloading and opening on another device;
- whether printing at the partner site is blocked where needed;
- what the user sees if access is revoked or the expiration passes.
This helps identify where restrictions help and where they hinder, so you can tune rules without unnecessary harshness.
Common errors and pitfalls in IRM/RMS configuration
Failures usually happen when IRM/RMS is set up as “bans for the sake of bans.” Then people get confused or look for workarounds.
The first trap is too many labels. When there are 10–15 labels that differ by a few words, users choose randomly or pick anything just to send the file. Better fewer, clearer labels: 3–5 levels with short examples in their names (e.g., “Internal: can be forwarded within company”).
The second mistake is identical rules for all departments. Accounting, legal, procurement and IT have different processes. One-size-fits-all will break something: lawyers often need printing for signatures, while finance needs internal forwarding within an approved circle.
The most conflict-prone ban is “no printing for everyone.” It often leads to workarounds: photos of screens, retyping, or requests like “send me an unprotected copy.” Printing is sometimes necessary, for example for regulators or internal archiving.
Another pitfall is launching without a pilot and user training. Support then drowns in questions like “why won’t it open?” and “where did the print button go?” A 2–3 group pilot and a short cheat sheet reduce noise dramatically.
Don’t forget offline, mobile and poor connectivity scenarios. If an employee on a business trip opens a file on a phone without the right app or network, the document may fail to open at the worst moment. Test mobile and offline opening, mail attachment handling and printing where it’s truly needed.
Realistic scenarios: how it looks in a workday
Restrictions work best when the user barely thinks about them. They see a clear sensitivity label, a short warning and continue their work. That’s how IRM/RMS protection should feel.
Scenario 1: sales send a proposal to a partner but ask not to forward
A manager prepares a commercial offer in Word and applies a label like “Offer – partner only.” Before sending the document shows a hint: “Forwarding prohibited, access only to specified recipients.” The partner opens the file, reads it and can leave comments if allowed, but cannot forward the attachment so another person would get access.
Scenario 2: accounting stores reports with no printing or copying
A financial report sits in SharePoint or a shared drive with restrictions. An accountant opens it as usual, but when attempting to print sees a message that printing is prohibited by policy. The same happens when trying to copy fragments to other files. Viewing, text search and team collaboration remain available if you enabled them.
Scenario 3: HR shares a read-only file with a manager
HR sends a candidate file to the manager with “view-only” rights. The manager can open it on laptop and mobile app but cannot edit, save an unprotected copy or take screenshots where technically blocked. Users typically see the label name, a short rule message, grayed-out (disabled) print/copy/forward buttons and a clear reason instead of a generic “access error.” If messages are clear and labels few, restrictions feel like guidance, not punishment.
Quick checklist before launch
Before starting, check not only settings but how people actually work with files. IRM/RMS gives good control, but if you overdo it employees will start bypassing rules.
Keep the preparation to a few items:
- keep 3–5 simple labels instead of dozens (if a label can’t be explained in 10 seconds, it’s unnecessary);
- assign an owner for each document type and decide who approves exceptions;
- test key actions on real files: open, forward, print, copy a fragment, download to a device (in typical apps and roles);
- prepare a pilot: a small department, a limited document set and clear metrics;
- start support before enabling restrictions: where to write, what to attach (screenshot, file name, time), response SLA and out-of-hours guidance for access denials.
A short test scenario: accounting sends reports to a manager and an auditor. In the pilot ensure the manager can open and print while the auditor can view only without forwarding. If any step breaks, return to rules and simplify.
Purview and alternatives: how to compare without marketing
Compare IRM/RMS solutions by real behavior: send a file, open it on a phone, forward it to a contractor, print it at reception. If these points cause constant errors and workarounds, protection becomes formality.
First, locate where your documents and mail live. If most work is in Microsoft 365 (Exchange, SharePoint, OneDrive, Teams) and you want unified policies, Microsoft Purview Information Protection often wins with built-in coverage: common labels and rules work for both mail and files.
Practical criteria that matter
Compare by simple points:
- support for your apps (Office on Windows and Mac, mobile, web editors, mail);
- user convenience (clear labels, predictable behavior for forwarding and printing, minimal manual steps);
- reporting and investigations (who opened, who tried to forward, what was blocked);
- external handling (guest access, expiration, revocation);
- integrations (DLP, SIEM, archive, ECM/EDM, terminal farms, VDI).
When to consider alternatives
Besides Purview, organizations recall Azure RMS and third-party IRM/EDRM solutions like Seclore, Vera, Fasoo, NextLabs and others. They make sense when you have many non-Microsoft environments, industry-specific integrations, or need to protect files in apps Purview covers less well.
Example: a bank uses Microsoft 365 for everything and needs quick labels for credit files—Purview gives unified policies and fewer settings to manage. But an industrial company with documents in CAD/PLM, isolated sites and VDI may find a third-party EDRM fits their infrastructure better.
If you choose deployment considering local infrastructure and requirements, an integrator like GSE.kz can help gather criteria and validate them in a pilot before enforcing restrictions company-wide.
Next steps: pilot, training and support
Start with a short pilot. Its goal is simple: verify that restrictions actually protect data and don’t break daily tasks.
Pick 2–3 policies and a set of files to test. A good test set includes typical contracts, reports with personal data, mail templates and external presentation decks. Use real working documents, not specially prepared files.
Typical pilot policies:
- “Internal document” – readable and forwardable inside the company, no external sending;
- “Confidential” – no external forwarding, printing limited, access only to a group;
- “For external partner” – access tied to recipient address and duration, no downloading.
Agree rules with security, legal and process owners before enabling restrictions. Legal will advise where auditability matters; process owners will flag critical steps like printing in branches.
Users don’t need long regs. A one-page cheat sheet works: how to choose a label, what restrictions mean, and what to do on errors. And provide a clear support path: where to write, what to attach (screenshot, file name, recipient), and expected response times.
If you need end-to-end delivery, GSE.kz as a vendor and integrator can assist with solution selection and delivery, policy configuration and integrations, plus ongoing support and operations.
FAQ
What does it mean in practice to “limit a document” rather than just “protect” it?
Limiting a document means defining what can be done with it after someone receives it. For example: who can open the file, whether printing, forwarding, copying text or editing is allowed, and how long access lasts.
Why doesn't a password solve the problem of controlling forwarding and printing?
A password only protects entry, not the file’s behavior after opening. Passwords are easy to share; once opened, the file can be forwarded, printed or copied and you lose control. IRM/RMS keeps rules in place even if the file is passed on.
How does IRM/RMS work if a file is forwarded or copied to a USB drive?
IRM/RMS checks permissions each time the file is opened and enforces restrictions inside the application. If a user isn’t allowed to print or copy, those actions will be blocked or unavailable. The protection travels with the file, not with a single folder or computer.
How is IRM/RMS different from DLP, and do I need to pick one?
DLP monitors channels (mail, messengers, uploads) to prevent data from leaving. IRM/RMS limits what someone can do with the file itself, even if a copy already reached the recipient. In practice, they usually complement each other rather than one replacing the other.
How many sensitivity labels should I create in Microsoft Purview at the start?
Start with 3–5 labels that are easy to explain in a few seconds: public, internal, confidential, strictly confidential. Assign clear permissions to each label: who can read, who can edit, and whether printing and forwarding are allowed. Too many labels almost always lead to confusion.
Where should I start the rollout so I don't “break” people’s work?
Quick start: pick 2–3 scenarios where files leave the department often—contracts, proposals, reports with personal data. Define roles and verify that the right people can open files while others cannot. Then run a pilot with a small group and adjust rules based on real cases.
How do I safely share protected files with contractors and partners?
For external recipients, use simple modes: view-only without forwarding, collaborative editing with restrictions on export, and final read-only versions. Add expiration and revocation if you need time-limited access. Test how forwarding, opening on other devices and printing behave before rollout.
Can you realistically prevent screenshots and photos of the screen?
Completely blocking screenshots is nearly impossible—someone can always use another camera. A realistic approach reduces the value of screenshots with watermarks, logging and restricting copy/export. These measures don’t replace IRM/RMS but make leaks less convenient and more detectable.
When should I enable auto-classification in Purview, and when should I avoid it?
Auto-classification helps when data patterns are consistent and false positives are rare—like identifiers or standard templates. Early on, prefer recommendations rather than automatic assignment to avoid many false positives. If labels 'stick' to too many files, simplify the rule or add conditions.
What mistakes are made most often when configuring IRM/RMS and how to avoid them?
Common mistakes are having too many labels, applying identical restrictions across all departments, and banning printing for everyone. Avoid these by running pilots, using clear label names and assigning rules by role rather than applying one template to the whole company. Assign rule owners (typically IS and legal) and a process owner (IT) to prevent chaos.