PC Hardware Security: TPM, Secure Boot and Disk Encryption
PC hardware security: how to enable TPM, Secure Boot and disk encryption in UEFI and Windows, then quickly verify that protections actually work.
What exactly do TPM, Secure Boot and disk encryption protect
PC hardware security exists to protect data and the boot process before Windows starts. TPM, Secure Boot and disk encryption are often enabled together because they cover different parts of the same goal.
What threat each feature mitigates
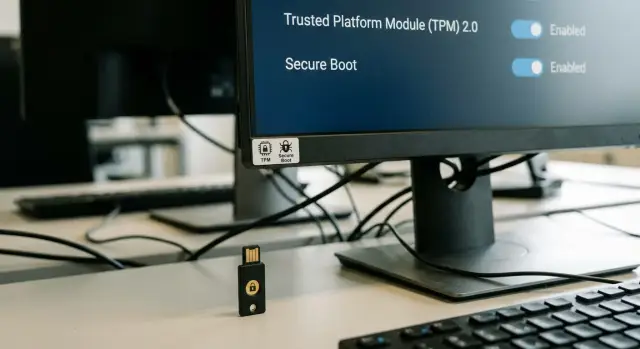
TPM (Trusted Platform Module) stores cryptographic keys inside a protected module and helps verify that the device and the boot chain haven't been tampered with. It reduces the risk of key theft and makes it harder for an attacker to access data by simply moving the drive to another computer.
Secure Boot checks that only a trusted bootloader and signed components are loaded at startup. It defends against bootkits and other attacks that embed themselves before Windows and can silently take control.
Disk encryption (for example, BitLocker) makes a drive's contents unreadable without the key. If a laptop is lost or stolen, even with physical access to the drive the data stays protected.
Together they act as a bundle: Secure Boot reduces the risk of a modified boot, TPM safely stores keys and participates in integrity checks, and disk encryption protects the actual files.
What these features do not solve
It’s important to understand the limits of protection so you don’t get a false sense of security.
They won’t save you from phishing when a user willingly enters credentials on a fake site. They do not compensate for weak passwords, shared departmental accounts, or disabled screen locking. They don’t fix an already-compromised running system if malware arrived via email or a USB stick. And they don’t replace controls for remote access, patching, and antivirus.
Set up TPM, Secure Boot and encryption in advance. After an incident it’s often too late: if the disk was already copied or the boot chain changed, enabling protections won't undo the consequences.
This is especially useful where there is a lot of personal data and strict reporting requirements: mobile employees, government agencies, healthcare, education and financial organizations. Even a single lost unencrypted device can become a data breach and trigger investigations.
Quick terms to avoid confusion in settings
To configure PC hardware security, it’s important not to mix three different things: the boot mode (UEFI/Legacy), boot chain verification (Secure Boot) and protection of data on the disk (encryption).
UEFI and Legacy BIOS are firmware modes the computer boots in. Legacy BIOS is the older option and is less suitable for modern security checks. UEFI is a modern firmware with support for signature verification of the bootloader and easier configuration. In practice Secure Boot almost always requires UEFI.
TPM 2.0 is a separate security module (sometimes a chip on the board, sometimes a processor feature). Its job is to store cryptographic secrets so they’re hard to extract even with physical access. In Windows TPM is commonly used to store encryption keys and to verify that the system boots in an expected state.
Secure Boot is a startup check: the UEFI firmware allows only early-boot components that are trusted by digital signature to run. If an attacker replaces the bootloader, Secure Boot will often simply prevent the system from starting.
Disk encryption (BitLocker) protects data if the device is stolen. Encrypted disk content looks like random data, and even if you remove an SSD and attach it to another PC you cannot read files without the key.
A handy memory aid:
- UEFI — where you enable Secure Boot and TPM
- TPM — where part of the decryption secret is stored
- Disk encryption — what makes data unreadable when stolen
If everything is configured correctly, in a routine laptop theft an attacker will be stopped by a recovery key or password prompt rather than being able to access your files.
Preparation before making changes: what to check
Before changing UEFI settings and enabling protective features, spend 10 minutes on basic checks. This reduces the risk that the system stops booting or encryption won’t enable because of a small issue.
-
Check that Windows is booting in UEFI, not Legacy (CSM). In Windows open System Information and find the “BIOS Mode” line. If it says “UEFI”, you’re on the right path.
-
Confirm your Windows edition. BitLocker depends on the edition (usually Pro/Enterprise/Education). On Home editions encryption may be limited or named differently.
-
Back up important files. After enabling Secure Boot or changing TPM settings you may need to reboot and confirm prompts. Don’t risk the only copy of critical data.
-
Prepare access. You’ll need an administrator account in Windows and to know how to get into UEFI (usually Del/F2 at startup, but it depends on the model). For corporate PCs check in advance whether there’s a UEFI password.
-
Check TPM 2.0. Open TPM Management (
tpm.msc) and see if “Specification Version: 2.0” appears. If TPM isn’t found, it doesn’t necessarily mean it’s absent — it may be disabled in UEFI.
Short checklist to have ready before configuring:
- Windows boots in UEFI (not Legacy/CSM)
- you know whether your Windows edition supports BitLocker
- you have a backup of important files
- you have admin access and know how to enter UEFI
- TPM 2.0 is confirmed or at least PTT/fTPM options are visible in UEFI
Step by step: enabling TPM and Secure Boot in UEFI
Basic hardware security begins before Windows — in UEFI settings. Option names vary (AMI/ASUS, Lenovo, HP, Dell), but the logic is similar.
1) Enter UEFI and find the relevant sections
Usually you enter right after powering on: commonly Del, F2, less often F10 or Esc. If you miss it, reboot and press the key repeatedly until the menu appears.
Then look for sections like Security, Boot, Advanced or Trusted Computing. TPM options may be under Advanced, while Secure Boot is often under Boot.
2) Enable TPM (TPM 2.0)
TPM can be named differently: TPM Device, TPM Support, Security Chip, PTT (Intel Platform Trust Technology) or fTPM (AMD).
Enable the TPM option (Enabled/On). If there’s a type choice, generally choose PTT for Intel or fTPM for AMD.
If you see an option to clear TPM (Clear TPM), don’t press it without need: that can affect already-configured encryption.
Save changes (often F10) and reboot.
3) Enable Secure Boot and UEFI mode
Secure Boot usually requires UEFI rather than Legacy/CSM.
Typical sequence: disable CSM/Legacy in Boot and select UEFI Only (or simply UEFI), then enable Secure Boot (Enabled). If there’s an option about keys, the Standard/Default keys mode is usually appropriate.
If Windows stops booting after changes
Most often the cause is that Windows was installed in Legacy mode. Re-enter UEFI and temporarily re-enable CSM/Legacy to restore boot.
If you’re unsure after enabling TPM/Secure Boot, avoid experimenting with disk or key settings. In corporate environments (domain, corporate image, BitLocker by policy) involve IT — sometimes the correct sequence for enabling TPM, Secure Boot and encryption matters to avoid recovery key prompts on the next reboot.
Verifying in Windows: did everything actually enable?
After changing UEFI settings it’s important to make sure Windows actually sees them. Otherwise you might think hardware security is configured while parts of it are not working.
TPM: check status via tpm.msc
Press Win + R, enter tpm.msc and open the snap-in. At the top you’ll usually see whether the module is ready.
If TPM is enabled and ready, Windows can use it to protect keys (for example, for disk encryption).
Secure Boot and boot mode: quick check in msinfo32
Press Win + R, enter msinfo32 and open System Information. Check:
- “Secure Boot State”: should be “On”
- “BIOS Mode”: should be “UEFI”, not “Legacy”
If Secure Boot is enabled in UEFI but shows as “Off” in Windows, the setting hasn’t applied or compatibility mode, keys, or drivers are interfering.
Also check the system disk partition style. In Disk Management right-click the disk (not a partition), choose Properties -> Volumes and look for “Partition style.” For modern UEFI setups you usually need “GUID Partition Table (GPT)”.
If a parameter is missing or you see an error
Common causes:
- TPM is disabled in UEFI or the wrong type is selected (PTT/fTPM not activated)
- the system boots in Legacy mode, so Secure Boot can’t be enabled
- the disk is MBR instead of GPT (common after old Windows installs or cloning)
- Secure Boot is enabled but Windows still says “Off” due to CSM or incompatible keys
tpm.mscreports TPM not ready: updating UEFI/BIOS and chipset drivers can help, but first check UEFI settings
If something doesn’t match, don’t turn everything on at once. Record what tpm.msc and msinfo32 show, then fix the specific cause.
Disk encryption: enable and configure without surprises
Disk encryption protects data if a laptop is stolen, the drive is moved to another PC, or someone tries to read it outside Windows. It’s one of the clearest steps for PC hardware security, especially when combined with TPM and Secure Boot.
Device encryption vs BitLocker
Windows has two similar options.
Device encryption is a simplified mode that on some laptops turns on automatically. It usually encrypts the system drive with few user options.
BitLocker is the full tool: it lets you choose which drives to encrypt, set rules for removable media and manage recovery keys. For corporate PCs BitLocker is generally easier to administer.
How to enable BitLocker
Make sure TPM is enabled and the system boots in UEFI. Then the typical flow is:
- Open BitLocker Management and select the system drive.
- Click “Turn on BitLocker” and choose an unlock method (commonly TPM, sometimes with an additional PIN).
- Choose what to encrypt: only used space (faster for new PCs) or the entire drive (better for an already-used device).
- Start encryption and leave the computer powered on until it completes.
On modern systems performance impact is usually small, but on older drives the initial encryption can take a noticeable time.
Recovery key is critical. If Windows decides the boot looks “suspicious” (for example after UEFI changes or a firmware update), it may ask for that key. If you lose the key you risk losing access to your data.
Where to store the recovery key:
- Microsoft account (for personal devices)
- domain/AD or MDM (for organizations)
- printed copy in a safe (as a backup)
- a separate secure medium not kept with the laptop
Encryption modes for internal and removable drives
For internal drives modern Windows uses XTS-AES. For removable drives enable BitLocker To Go and set a password. If the USB device needs to be opened on older Windows versions, choose a compatible encryption mode.
To check status open BitLocker Management or run manage-bde -status in an elevated command prompt.
Practical example: an employee loses a laptop on a business trip. Without encryption an attacker can connect the drive to another PC and copy files. With BitLocker enabled and the recovery key stored correctly, the data stays protected even with physical access to the drive.
Real-case example: lost laptop and attempts to access data
An employee loses a laptop in a taxi. The drive contains work files: contracts, correspondence, scanned documents, browser-stored passwords. The finder needn’t be a hacker — curiosity alone is often enough.
The first common attempt is to boot from a USB stick (for example a Linux live system) and open the user folder. If the drive isn’t encrypted this usually works. With BitLocker enabled, the data remains encrypted blocks and cannot be read without the key.
The next attempt is to tamper with the boot process to bypass protections. Here the combination of Secure Boot and TPM 2.0 matters. Secure Boot checks the bootloader and early drivers’ signatures. TPM records boot parameters. If BitLocker is tied to TPM, Windows will only release the decryption key when the configuration matches the expected state.
If an attacker boots from external media, disables Secure Boot, replaces the bootloader, changes UEFI settings or moves the drive to another machine, BitLocker should prevent access. At best the device will prompt for a recovery key before Windows starts.
The same logic applies in benign scenarios: after repair, a UEFI/BIOS update, or a motherboard replacement. Sometimes resetting UEFI defaults causes TPM to see a changed configuration — the system requests the recovery key. This is not a failure but a normal security reaction to changes.
First hours after loss are critical. The owner should notify IT immediately and change passwords for work accounts (email, VPN, corporate portals). If there’s device management, mark the laptop as lost. IT should check whether BitLocker was enabled, where the recovery key is stored, and whether any local secrets need revocation (certificates, tokens, saved passwords).
Common mistakes and pitfalls that cause problems
Problems usually arise not from the features themselves but from incorrect sequences or settings.
Secure Boot enabled and Windows won’t boot
A typical case: Secure Boot is turned on when the system was installed in Legacy mode (or the disk is MBR). Result — black screen or “bootloader not found.”
Don’t try to fix this by random toggling. First revert settings, boot, check the mode (UEFI vs Legacy) and then plan the migration to UEFI and GPT.
Cleared TPM and lost data access
TPM stores keys used by BitLocker. Therefore the Clear TPM option in UEFI or “Prepare the TPM” in Windows should only be used with full understanding.
If you clear TPM on an encrypted device, BitLocker may request the recovery key on next boot. This is expected: the system detects a change in the trusted module and stops automatically decrypting the disk.
Recovery key not saved or saved alongside the device
The most dangerous mistake is enabling encryption and not properly storing the recovery key. The second-worst is saving the key on the same computer or on a USB stick kept with the laptop.
Minimum safe practice: save the key in an account or directory accessible to admins, keep a copy in a secure store, and ensure the key can be quickly found by device name.
USB-first boot priority and unsecured UEFI
If USB is first in boot order an attacker can more easily boot from external media and attack the system offline. Secure Boot helps but does not cover all scenarios.
Practical approach: disable unnecessary boot options, set the internal disk first, and protect UEFI entry with an admin password.
Mixing corporate policies and manual settings
Organizations often have policies that manage BitLocker, TPM requirements and boot settings. If you manually enable something on a corporate PC and the policy enforces a different setting, conflicts can arise: encryption won’t start or the system will repeatedly ask for the recovery key.
For corporate devices confirm who manages policies and ensure your chosen configuration aligns with the standard.
Quick 5-minute checklist after setup
After enabling TPM, Secure Boot and encryption, quickly verify everything really works.
- UEFI and GPT. In
msinfo32the “BIOS Mode” should be UEFI. In Disk Management the system disk partition style should be GPT. - TPM 2.0 ready. In
tpm.mscthe status should be “The TPM is ready for use”, and the specification version 2.0. - Secure Boot enabled. In
msinfo32“Secure Boot State” should be “On”. - BitLocker enabled and key stored separately. Check BitLocker Management and ensure the recovery key is not kept on the same PC.
- UEFI protected. An administrator password is set and boot from USB/external devices is restricted or requires confirmation.
A final test takes a minute: reboot the PC 1–2 times. Normally Windows should start as usual without recovery key prompts. If the key is requested on every boot, parameters are changing or TPM is not correctly bound.
For organizations it’s useful to record results in a short report (model, TPM/Secure Boot/BitLocker statuses). This is important when buying batches of PCs and workstations, where consistent settings simplify support.
Next steps for organizations: standards, procurement, support
Once basic functions are enabled on one PC, the next step is to make it a standard across the fleet. Hardware security works best when it’s consistent: fewer exceptions lower the chance that a single overlooked laptop becomes a leak.
Formalize a minimum standard
If you have more than 10–20 computers, remote employees, or handle personal data, formalize a baseline: TPM 2.0 enabled, Secure Boot enabled, system disk encrypted, rules for storing recovery keys and procedures for repair or reinstalling Windows.
When procuring, check not only that a device includes Windows, but also that it supports TPM 2.0 and Secure Boot without workaround modes. For the public sector the equipment origin and vendor status may be important.
Add simple verification questions to specifications: is TPM 2.0 confirmed in UEFI and Windows, does Secure Boot enable out of the box, how are UEFI/BIOS updates organized and what happens on settings reset, who is responsible for servicing and how will recovery keys be stored.
If you need to cover procurement, deployment and support, consider GSE.kz (gse.kz) as a local manufacturer and systems integrator: the company has been an official domestic producer since 2015, holds ISO 9001/14001/45001 certifications, and offers 24/7 service and support.
A one-month rollout plan
To avoid enabling everything at once, roll out in stages:
- Week 1: inventory the fleet (models, UEFI versions, TPM presence, Windows editions).
- Week 2: pilot on 5–10 devices (policies, key storage, boot and recovery tests).
- Week 3: deploy by departments with short maintenance windows and user instructions.
- Week 4: compliance check (reports, spot checks, fix exceptions) and formalize the standard in procedures.
This way setup becomes a manageable practice rather than a one-off task, surviving updates, repairs and staff turnover.