Embedding PCs into Info Kiosks and Cabinets: Cooling and Service
Embedding PCs into info kiosks and cabinets: practical requirements for cooling, dust filtration and easy port access for servicing.
Why put PCs into info kiosks and cabinets
PCs are hidden in info kiosks and cabinets not just for looks. The goal is simple: keep the computer out of reach, free up desk space and reduce the risk of accidental shutdowns. This is important where people pass by often and can easily catch a cable, press a power button, or spill liquid.
This approach is common at reception desks, clinics and public service centers, in classrooms, government offices and bank branches. They value order and a consistent workspace. When the system unit is concealed, only the monitor, keyboard and what the employee needs remain on the desk.
But hiding the case also hides potential problems. Embedding should be planned with servicing in mind, not only placement. If replacing a flash drive, checking the network or rebooting requires dismantling half the construction, maintenance becomes expensive and less frequent than needed.
Limits are often set not by the PC itself but by the surrounding environment. Before installation it’s useful to understand:
- how busy the area is and whether there’s a risk of knocks, vandalism or accidental button presses;
- how often cleaning is done and how much dust there is (carpet, open windows, nearby construction);
- if there are heat sources nearby (radiator, direct sun) and how stuffy the room is;
- who will service the equipment and how quickly they need access;
- whether security measures are needed: locks, seals, covered ports.
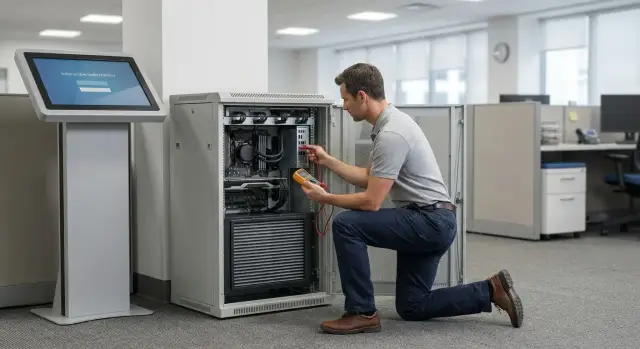
A practical example: at a clinic registration desk PCs are hidden in a cabinet so patients don’t touch cables or see service devices. But if ventilation, dust filtration and normal access to USB and network ports are not planned, after a few months overheating, freezes and downtime begin. At the start it pays off to choose a case, rack and layout so servicing is as easy as usage.
Main issues: heat, dust and servicing
Inside a cabinet a PC operates in an enclosed volume. In a regular office the case takes air from all sides, while inside a rack air often recirculates. If intake and exhaust are blocked by a wall or cables, temperature rises quickly. Throttling and sudden reboots look like 'mystery' failures, though the cause is usually cooling.
The second typical problem is dust. Fans constantly pull air through gaps, and doors and cable entries are rarely airtight. Dust clogs heatsinks, cooling worsens, fans spin faster and noise increases.
A third pain point is service access. The PC might be perfectly fine, but hard to reach. There may be no access to USB for drives and service peripherals, to the video output for diagnostics, to the network port, or even to the power button. A simple check turns into dismantling the rack.
Cables also suffer: opening a door or moving the rack can pull, kink or yank connectors. HDMI/DP and USB are most commonly affected.
Signs that the layout needs fixing:
- warm, stagnant air inside the rack and a noticeably hot case;
- fans louder than in a normal installation;
- ports blocked by panels or pressed against the wall;
- cables tight and catching on the door;
- dust visible after 2–4 weeks.
How to choose a rack or cabinet for a PC
Start with dimensions and actual internal volume rather than appearance. Besides the PC you need room for cable loops, power, outlets or a PDU, tie wraps and sometimes a small switch. If everything is tight, the door will press on connectors, cables will bend and fail faster.
Next decide on form factor. Compact cases and SFF are easier to place and service in tight spaces. A mini tower needs more depth and often disrupts airflow. All-in-ones inside cabinets do not always fit well: ports are harder to reach and heat is harder to remove if the rear panel is close to the cabinet wall.
Mounting is as important as dimensions. Decide how the PC is fixed and how it will be removed for service. In practice shelves, rails, brackets or sliding trays are used. If a rack stands in a passageway, anti-vibration elements and secure fixing help prevent the case shifting from accidental knocks.
Check serviceability early: the door must open far enough and not hit the wall, and removable side panels and spare space near ports speed up technician work.
Cooling: how to organize airflow
Cooling is almost always the main risk in an enclosed volume. The computer can start circulating warmed air, and temperature rises faster than expected.
First, check where that particular PC intakes air and where it exhausts. Most cases pull air in from the front or bottom and push it out the back (sometimes also upward). If the intake is blocked by the cabinet door or a cable bundle, fans "choke" and hot air stays inside the cabinet.
Basic flow logic
The task is simple: separate cold and hot streams. Cold air should reach the PC intake, and hot air should exit the cabinet and not return.
In practice a few rules help:
- don’t block case grills or cabinet perforation;
- leave clear space in front of the intake and behind the exhaust;
- keep cable bundles out of fan zones;
- don’t place the PC flush against a wall if exhaust is to the rear;
- use perforated shelves where possible.
When cabinet fans are needed
Additional ventilation is required if the interior stays hot, if several devices share the cabinet, or if the rack is closed with little perforation. An exhaust at the top or rear usually helps: hot air rises and is easier to remove that way.
Noise matters too, especially at reception, in clinics or classrooms. Fewer fans with a clear airflow direction are better than many fans placed randomly. First ensure correct airflow direction, then increase fan speed if needed.
If PCs or servers run under load for long periods, estimate thermal load when selecting equipment and planning layout. Otherwise the cabinet can quickly become a "thermos."
Dust filtration: what to install and how to maintain it
Dust is often considered last, but it’s what quickly destroys cooling in an enclosed space. Dust settles on heatsinks and grills, fans work harder and noisier, and temperatures rise even under normal load.
Dust also accelerates fan wear, degrades connector contacts, and equipment starts acting up when it’s hardest to service.
Where to put the filter
Install the filter on the air intake, not on the exhaust. The idea is to keep dirt out. If a filter is only on the exhaust, dust will still be drawn in through gaps and settle inside the cabinet.
Remember: any filter creates resistance. The finer it is, the better it traps dust, but the more it can reduce airflow. It’s usually more practical to choose a filter that is easy to remove and quick to clean than a rarely serviced solution that turns into a plug.
Common convenient options:
- removable washable filters on the front grill or bottom intake;
- magnetic or framed filters that remove without tools;
- filter cassettes in the door if the door is the main intake.
How often to clean
Tie the schedule to room cleaning and the season. In busy places (public service centers, clinics, teaching buildings) filters clog faster, especially in spring and summer.
Signs you need cleaning now:
- fans are noticeably louder without increased load;
- CPU or internal temperatures rise by 5–10°C compared to a clean state;
- the PC reboots, downclocks or slows more often;
- a thick gray layer appears on the grill.
A useful habit is to record normal temperatures and noise after cleaning. Deviations become visible immediately.
Port access and cable management
Even if the PC is hidden, it still needs servicing: attach a flash drive, replace peripherals, check the network, or output video to a service monitor. Decide in advance which ports must be accessible without disassembly.
Usually you need USB, RJ-45, a video output (for diagnostics), and sometimes audio. Good practice is to make at least one USB and one RJ-45 accessible from the front or via a service hatch.
If the cabinet is locked, in restricted access or pushed against a wall, external ports and extenders simplify life. For video, a short service cable inside the cabinet is often enough, positioned so it can be reached without removing shelves or unplugging cables.
The power button and status LEDs matter too. If you can’t see whether the PC is on or safely reboot it without opening the cabinet, diagnosis becomes guesswork. A remote power button, an extension for the button, or at least visibility of LEDs helps.
Route cables so connectors are not stressed:
- label both ends;
- leave a small service loop before the port;
- secure cables to the rack, not the PC case;
- separate power and signal lines.
A simple post-install test: imagine a technician arrives at night with 10 minutes. They should open one access point, see indicators, plug in a service monitor and USB, check RJ-45, and close the cabinet without reorganizing cables.
Power, safety and basic monitoring
More incidents come from power than fans: overloaded extension cords, swapped plugs, or plugs pulled during cleaning. These risks are easier to mitigate in advance.
If possible, give the rack a dedicated circuit: PC, monitor, printer, scanner, router or switch can create unpleasant peaks. One quality power distributor (PDU) with labeled sockets is better than a chain of extension leads.
Run power and low-voltage cables separately. Check cabinet and outlet grounding, especially in buildings with complex or patchwork wiring.
A UPS is needed where even a short outage is unacceptable: queues at a public service counter, medical recording, a cash desk, or a security post. Place it low in the rack with clearance for ventilation and battery access.
For basic monitoring you don’t need complex software. A temperature sensor and a clear agreement on who responds when the cabinet gets hot are enough.
Example: an info kiosk at a clinic or public service center
An info kiosk at a clinic or public service center runs all day. People come continuously, printers and scanners are nearby, and cleaning is frequent. Access to internals is limited: only an authorized person opens the cabinet. In such conditions the layout must prevent overheating, dust buildup and allow minute-level servicing.
For cooling, define a clear airflow path: cold air in from the bottom or front, hot air out the top or back. If the rack is against a wall, leave clearance for exhaust and don’t block grills with cables. A common mistake is to shove the PC in, close the door and see temperature, noise and freezes rise.
For dust follow a simple rule: the filter must be on the intake and must have a responsible owner. If the filter is hidden and hard to reach, it won’t be cleaned.
In most cases a basic set is enough: a clear airflow path, a removable filter with a simple maintenance schedule, and service access without removing the front panel.
Step-by-step: how to install a PC and verify the result
Before mounting, sketch a plan: where the PC, UPS, switch (if needed) sit, how power and network cables run, and how you open the door and reach ports.
Typical sequence:
- Check cabinet ventilation: find intake and exhaust, ensure holes aren’t blocked and there’s clearance for circulation.
- Install and secure the PC on a shelf/rails so it won’t shift or vibrate.
- Fit a filter on the intake and verify it can be removed without tools and without disconnecting cables.
- Connect power and network, separate power and signal lines, and route cables with a small service loop.
- Label cables and ports. Add retainers where connectors can be pulled during service.
After assembly close the cabinet and run a 15–30 minute stress test (typical work tasks, updates, antivirus scan). Stability matters more than peak numbers: check for throttling and reboots in the closed state. If temperatures rise quickly, freeing the intake, removing cable bundles from the flow, or adding an exhaust fan usually helps.
Finally check serviceability: can you connect USB, a service monitor, test the network and replace the filter without dismantling the facade?
Common mistakes and how to avoid them
The most expensive mistakes are usually small: blocking airflow, hiding ports, and leaving no cable slack.
A frequent case: the PC is installed neatly and a decorative panel closes the cabinet, and a week later overheating starts. The reason is simple: the panel, a thick cable bundle or a blanking plate blocked the intake. Grills must have free "breathing" and exhaust needs space to go.
Another trap is a filter that’s too tight. It captures dust well but can drastically reduce airflow. The result: fans spin faster, noise increases and temperature rises. A reliable filter that’s easy to service plus a clear cleaning schedule is safer.
A third mistake is hiding ports inside. If USB, video or network are only accessible after disassembly, every small operation becomes downtime and a field service call.
Remember five rules:
- leave clearance at intake and exhaust and don’t press cables against grills;
- check filter impact on temperatures before and after installation;
- make service ports accessible without disassembly;
- leave cable loops for service so connectors aren’t stressed;
- separate and secure power and signal lines.
Quick checklist and next steps
Before putting into operation, run a short on-site check:
- Air: clear intake and exhaust, grills not blocked by cables or power units. With the door closed temperature shouldn’t rise noticeably in 15–20 minutes.
- Dust: filter on the intake, securely mounted and removable without tools. It’s clear who cleans it and how often.
- Ports: USB, video and network accessible for service without disassembly.
- Cables: labeled at both ends, secured with a small service loop. Nothing is taut or rubbing on edges.
- Service: the PC can be pulled out or opened for cleaning and replacing storage/memory without dismantling the whole kiosk.
Next, document requirements in writing: where the rack is located, how many users, expected load (office, video surveillance, terminal), dust level, and operating mode (8/5 or 24/7). With these inputs it’s easier to choose case, cooling, filtration and how to route ports.
If the project is in Kazakhstan and you need a complete solution (equipment, layout, power and ongoing maintenance), it’s more convenient to work with a system integrator. For example, GSE.kz selects and supplies locally produced PCs and servers for organizations’ needs and helps plan service access and on-site operation.
FAQ
Why hide a PC in an info kiosk or cabinet at all?
Usually it's done to keep the PC out of reach, free up desk space and reduce the risk of accidental shutdowns. In high-traffic areas it also protects cables and power buttons from accidental knocks and damage.
Which is better: a closed cabinet or an open rack for a PC?
If order and restricted access matter, a closed cabinet is common, but you must plan ventilation and service hatches in advance. If easy servicing is the priority, choose a design with quick port access and sufficient perforation, even if it looks less 'closed'.
How do I know the cabinet is the right size for the PC and cables?
Measure internal depth and width including cable loops, power distribution and room for a technician’s hands. If everything is tight, doors will press on connectors and cables will bend and fail faster.
Which PC form factor is easiest to install in a cabinet?
SFF or compact cases are usually more convenient because they leave more room for airflow and cables. Mini towers need more depth and tolerate layout mistakes worse, especially if the exhaust faces a wall.
How should I organize cooling for a PC inside a closed cabinet?
Treat any blockage of intake or exhaust as a risk: doors, panels or cable bundles. Ensure intake grills can 'breathe', leave clearance behind exhaust vents and make sure hot air can exit the cabinet so it doesn’t recirculate.
When do I need additional fans in the cabinet?
Add extra ventilation when the cabinet stays warm, when multiple devices share it, or when perforation is clearly insufficient. An exhaust at the top or rear is often most effective because hot air rises and can be removed with less noise.
Where should a dust filter be placed and why does it matter?
Place the filter on the intake — where the cabinet draws air from — so dust is kept out. Choose filters that are quick to remove and clean; a filter that’s hard to access will be neglected and become a blockage.
How often should filters be cleaned and how do I know it’s time?
Tie cleaning frequency to room cleaning and the season. If grills show visible grey dust in a couple of weeks, clean more often. A practical method is to record 'normal' temperatures after a clean and watch for deviations.
Which ports should be made accessible for service?
At minimum make USB for storage and service peripherals, RJ-45 for quick network checks, and a video output for diagnostics accessible without disassembly. If routine checks require opening the rack, downtime and service calls will increase.
What should I consider about power and UPS in an info kiosk?
Problems usually come from overloaded extension cords, mixed-up plugs and accidental unplugging during cleaning. Use one good power distributor, clearly label sockets, and install a UPS if short outages are unacceptable. Place the UPS low in the rack with ventilation space.